
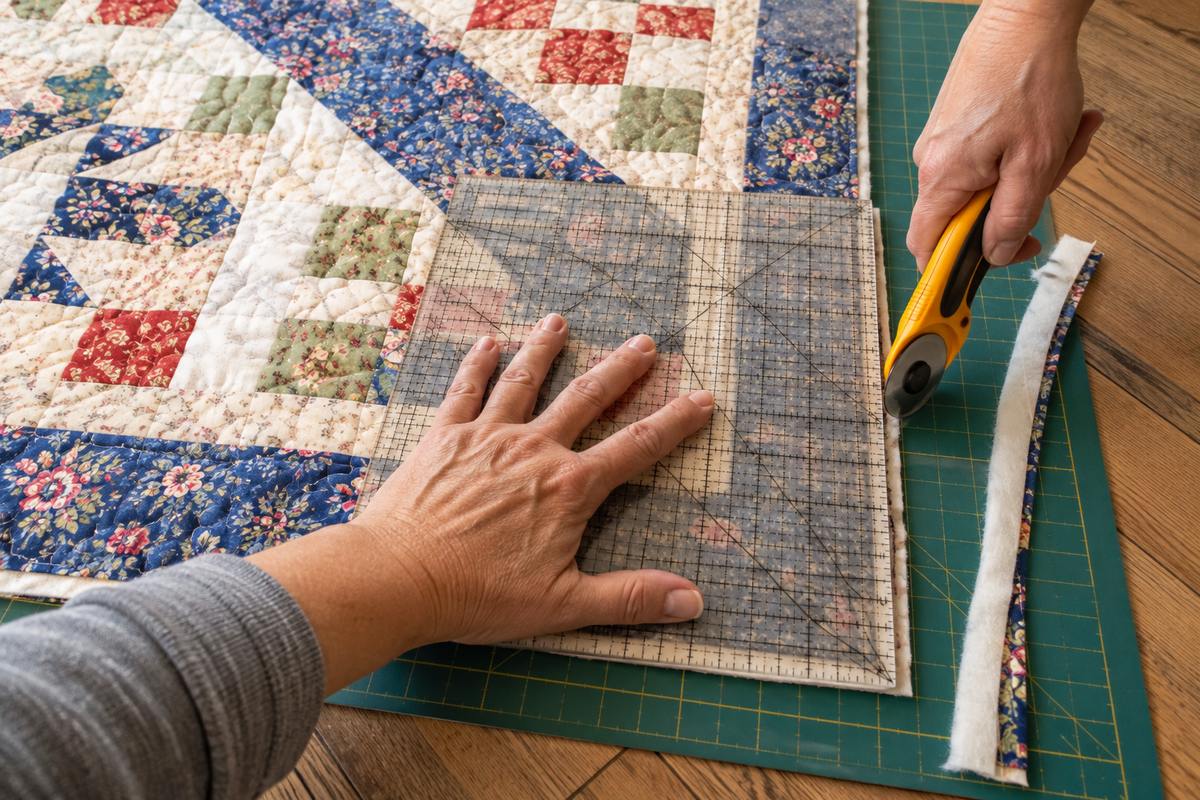
To square up a quilt, press it, lay it flat on a large surface, and trim each corner to a true 90-degree angle with a large square ruler. Then connect the corners by trimming the sides with a long ruler, sliding it along as you go. Before you cut anything, check that the quilt is close to square. If it is badly skewed, block it first so the trimming only has to remove a little.
Squaring up sounds fussy, but it is what lets the binding lie flat and the quilt hang straight. Quilting pulls and shifts the layers, so even a top that went into the machine perfectly square often doesn't come out that way. A few careful cuts fix most of it.
Table of Contents
What "Square" Means and How to Check It
A square quilt has four 90-degree corners, and its opposite sides are the same length. Most quilts are rectangles, of course, so "square" here really means true, with every corner square and every edge straight.
The quickest check is to use a tape measure. Lay the quilt flat and measure from one corner to the opposite corner, then do the same across the other diagonal. If the quilt is square, the two diagonals match. Then measure the top against the bottom and the left side against the right. When the diagonals and opposite sides match, the corners must be 90 degrees, as long as the edges are straight.
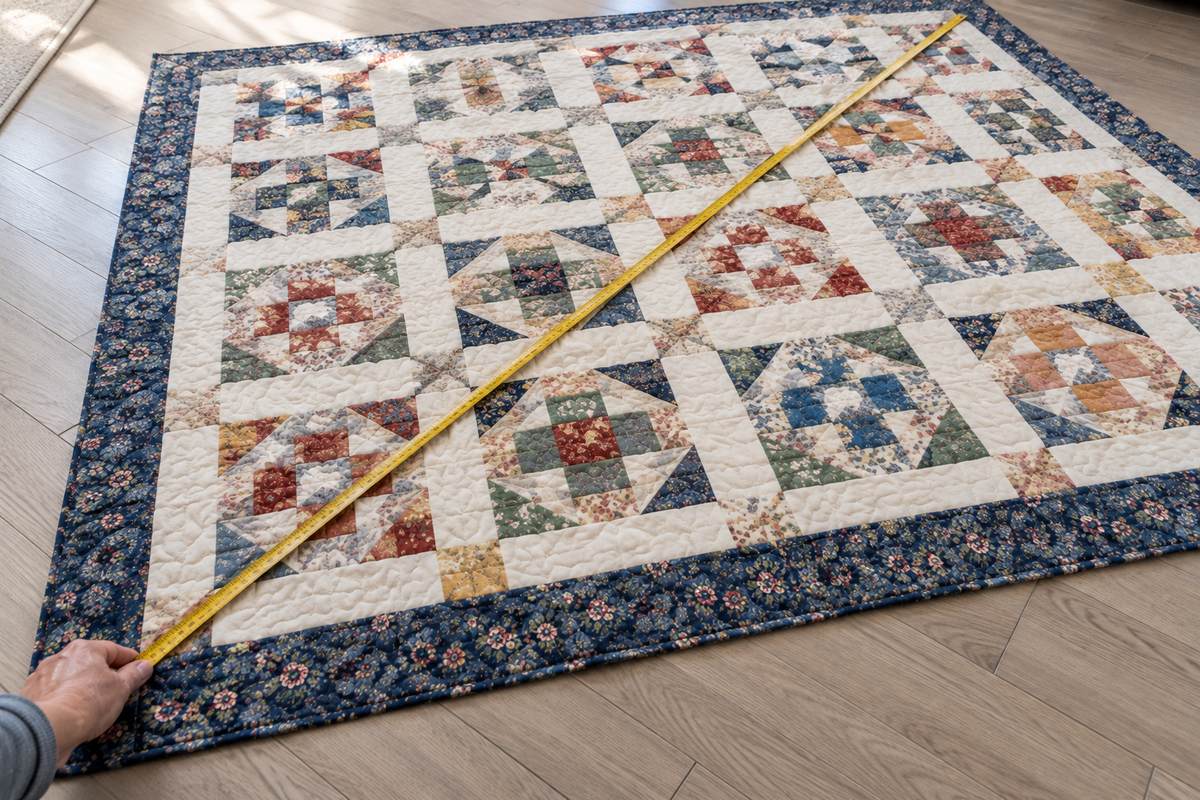
Small differences are normal. A quarter inch here and there will disappear when you trim. A difference of more than about half an inch between the diagonals means the quilt is skewed, and trimming alone will either cut into your design or leave the quilt lopsided. That is the time to block it first, which is covered further down.
Tools That Make It Easier
You need a rotary cutter, a self-healing cutting mat, and two acrylic rulers: a large square one for the corners and a long, narrow one for the sides. A 6-by-24-inch ruler works well for the sides. For the corners, a 12½-inch square works, and a 15½- or 16½-inch square makes the job faster because it covers more of each corner at once. Our guide to quilting rulers for beginners covers sizes and grips.
Put a fresh blade in your cutter before you start. You'll cut through three layers along every edge of the quilt, and a dull blade drags, skips, and tempts you to press harder, which is when rulers slip. An iron, a spray bottle of water, and a large flat surface round out the kit.
How to Square Up a Quilt After Quilting
Most quilters follow this order. Corners come first because they set the right angles, and the sides simply connect them.
- Press the quilt. Mist it lightly with water and press out wrinkles and folds. A quilt that has been sitting folded will have creases that throw off your ruler.
- Spread it flat. Use the floor or a large table, and smooth the quilt from the center out. Don't let any part hang off the edge, because the weight pulls the edges out of shape.
- Square the first corner. Set the square ruler in a corner. Line up its marks with a border seam or a row of blocks, not just the raw edge, since the raw edge is the part most likely to be off. Trim along both sides of the ruler.
- Square the opposite corner. Move the mat and ruler to the diagonal corner and trim it the same way.
- Trim the side between them. Lay the long ruler along the edge, starting from a trimmed corner so the ruler overlaps the cut by a few inches. Trim, slide the ruler along, line it up again, and keep going until you reach the next corner.
- Finish the other corners and sides. Work your way around until all four corners are square and all four sides are straight.
- Check your work. Measure the diagonals again. If they match within about a quarter inch, you are ready to bind.
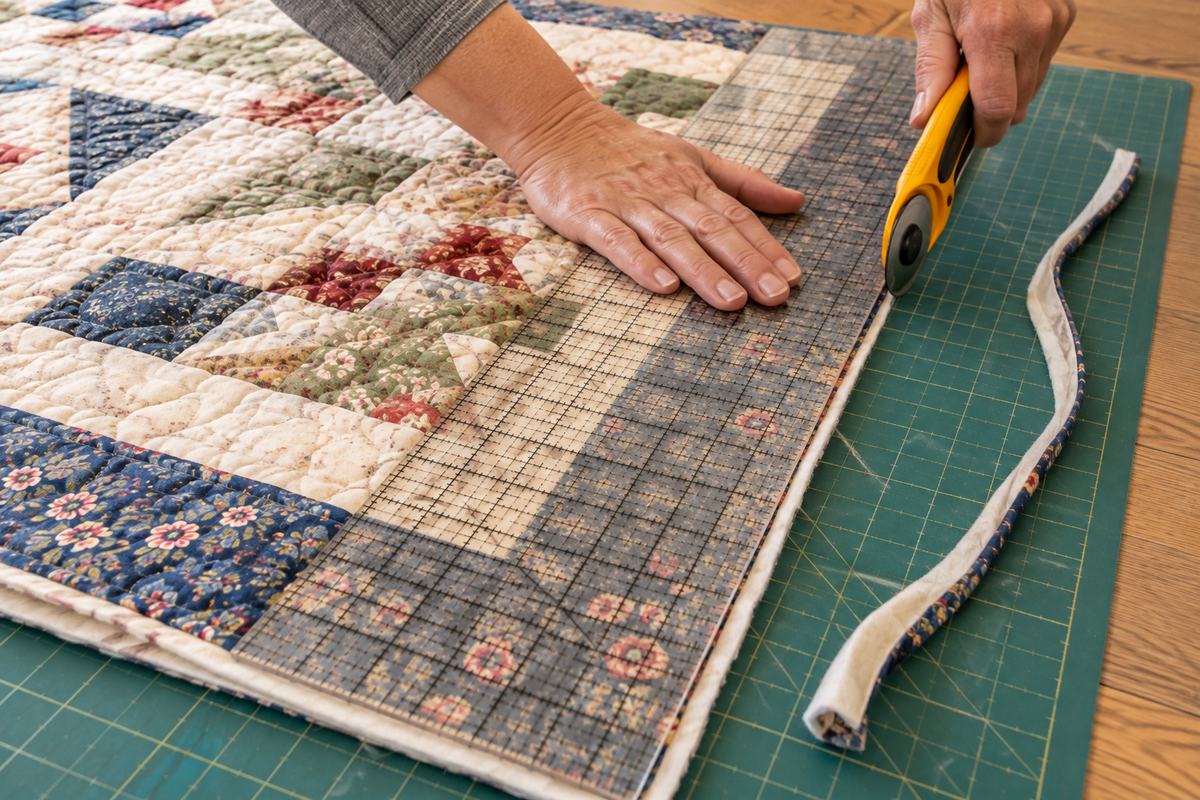
A handy trick for the corners: leave the square ruler in place and butt the long ruler against it. Together they act like one giant square, which helps on big quilts where the corner ruler alone can't reach far enough down the side.
On a pieced border, or anywhere points run close to the edge, keep at least a quarter inch of fabric beyond the points. That quarter inch disappears into the binding seam. Trim closer, and you will cut the tips off your points.
How Much to Trim Away
For most quilts, you trim the batting and backing flush with the quilt top. The binding wraps around that edge, and the quarter-inch seam that attaches it sits just inside the cut. Binding strips are usually cut 2¼ inches wide, or 2½ inches for a thicker quilt, so the binding has enough width to wrap the layers and still cover the stitching on the back.
Some quilters like a fuller, rounder binding and leave an eighth to a quarter inch of batting and backing showing past the top. If you do this, cut your binding strips a little wider and sew them on with a slightly wider seam, or the binding will be too tight to fold over.
Don't count on trimming to fix a top that is smaller than planned. If you need room to square things up, plan for it when you cut the borders. Cutting them about an inch wider than the pattern calls for gives you a margin to trim back after quilting.
When the Quilt Is Badly Out of Square
If the diagonals differ by more than about half an inch, or a border still waves after pressing, trimming alone won't fix it. Blocking reshapes the quilt first.
To block, measure the quilt's length and width before you start, so you know the size you are aiming for. Then wet the quilt, either by soaking it or by spraying it until damp all the way through. Lay it on a clean, flat surface you can pin to, gently ease it into shape, measure the diagonals as you go, and pin the edges every few inches. Leave it pinned until it is completely dry, then trim. If you aren't sure whether a fabric will bleed, test a scrap in water first.
For a quilt that is only slightly off, steam can do the same job with less work. Press with plenty of steam while you gently nudge the quilt toward square, then let it cool and dry flat before you trim.
If a corner is off by just a little, split the difference. Set the square ruler so you trim a small, equal amount from both sides of the corner instead of a big wedge from one.
Square Up the Blocks and Quilt Top Earlier
The final trim is easier when the quilt was square before it ever reached the machine. Two earlier steps make the biggest difference.
First, trim each block to the same size before you sew the rows together. A set of blocks that are all a little different will never form a square top, no matter how careful the final trim is.
Second, measure borders through the middle of the quilt, not along its edges. Edges often stretch while you piece and press, so they can measure longer than the center. Measure the length in three places, down the middle and a few inches in from each side, and average the three numbers. Cut both side borders to that length, pin the centers and the ends first, and then pin the rest every 6 to 8 inches before you sew. Repeat for the top and bottom borders. Sewing a long strip and then trimming the excess is a common cause of wavy borders.
Squaring Up Without a Big Table
A large quilt rarely fits on a cutting table, so many quilters work on the floor. A clean, hard floor gives you room to lay the whole quilt flat, and you can slide the cutting mat under each section as you reach it. It is hard on the knees, but it keeps the quilt from hanging off an edge and stretching.
If you must use a table, support as much of the quilt as you can and fold or loosely roll the parts you aren't cutting. Keep the section you are trimming flat and smooth, and move the quilt rather than reaching across it. Our guide to the best sewing table for quilting covers setups that leave room to spread out.
How to Square Up a Quilt: Common Questions
Do you have to square up a quilt before binding?
You don't have to, but it helps. Square corners and straight edges make binding easier, help it lie flat, and keep the finished quilt hanging straight.
Should I square up the quilt top before quilting?
Yes, if it is clearly out of square. Fixing a skewed top before quilting is easier than after, because only one layer is involved. Most quilters still trim again after quilting, since the stitching shifts the layers.
What size ruler do I need to square up a quilt?
A 6-by-24-inch ruler for the sides and a square ruler for the corners. A 12½-inch square works, but a 15½- or 16½-inch square is faster on large quilts.
How do I know if my quilt is square?
Measure both diagonals from corner to corner. If they match and the opposite sides are the same length, the quilt is square.
Can I square up a quilt on the floor?
Yes. Many quilters prefer it for large quilts, because the whole quilt stays flat and nothing hangs off an edge. Slide the cutting mat under each section as you trim.
What if squaring up cuts off my points?
Stop before you reach them. Keep at least a quarter inch of fabric beyond any points along the edge. If the quilt is too far off square to trim without cutting into the design, block it first.
Getting Ready to Bind
Once the corners are square and the edges straight, measure the four sides, add them together, and add about 12 inches for the corners and the final join. That total tells you how much binding to make. Our guide on how to bind a quilt has a free planner that turns that total into strips and fabric, then explains each sewing step. A careful square-up is often the difference between a binding that fights you and one that goes on smoothly.