
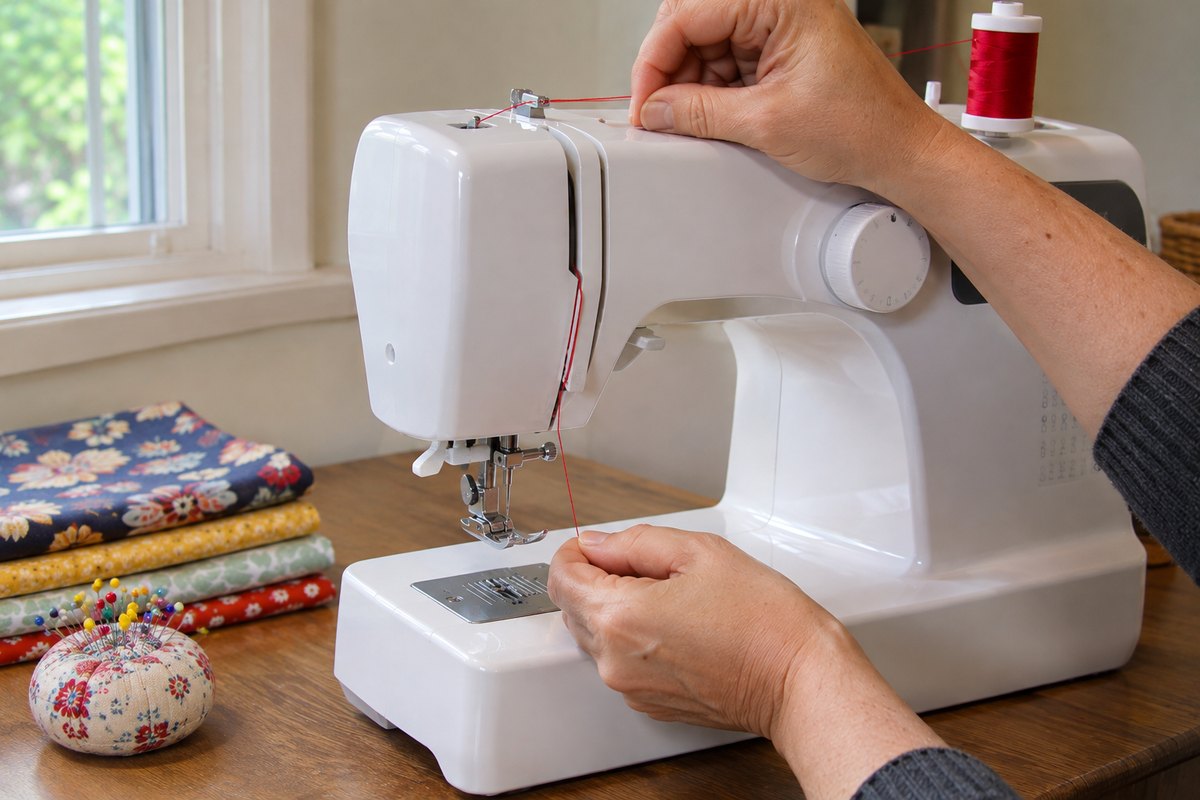
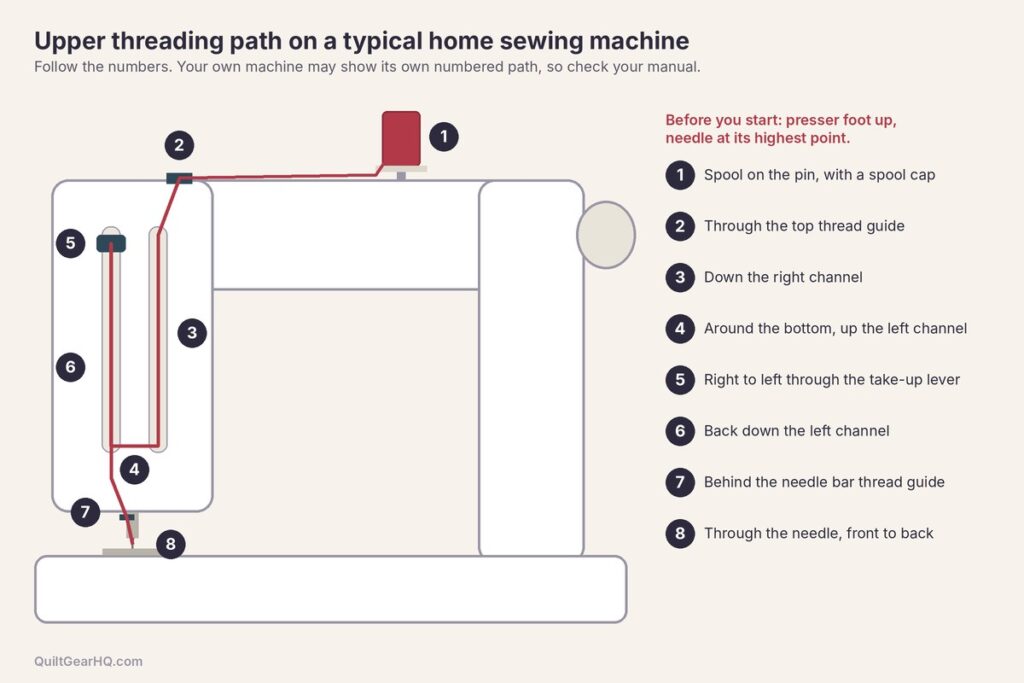
Here is how to thread a sewing machine. Raise the presser foot, turn the handwheel toward you until the needle is at its highest point, and put the spool on the spool pin with a spool cap. Then pull the thread through the top guide, down the right channel, up the left channel, through the take-up lever, back down the left channel, behind the needle bar guide, and through the needle eye from front to back. The same path works on most modern Brother, Singer, and Janome machines.
QuiltGearHQ is a participant in the Amazon Services LLC Associates Program, an affiliate advertising program designed to provide a means for sites to earn advertising fees by advertising and linking to Amazon.com.
This guide walks through the upper thread step by step, then covers brand differences, the automatic needle threader, and how to bring up the bobbin thread. A troubleshooter near the end matches common problems, like a nest of thread under the fabric, to the threading mistake that usually causes them. The steps come from the Brother, Singer, and Janome instruction manuals, so check your own manual if your machine looks different.
Table of Contents
Before You Start
Two settings matter more than anything else when you thread a sewing machine. Get them right, and the rest is easy.
- Raise the presser foot. The presser foot holds the fabric down. When it is up, the tension discs (two small metal plates that squeeze the thread) open so the thread can slip between them. The Singer 4423 manual says to "raise the presser foot to release the tension discs." If you thread with the foot down, the thread can miss the discs, and the top thread stays loose.
- Raise the needle to its highest point. Turn the handwheel, the large wheel on the right side of the machine, toward you until the needle and the take-up lever are at the top. Brother, Singer, and Janome all say to turn the handwheel toward you.
For safety, the Singer 4423 manual suggests turning the power off before threading. Some computerized machines use a needle-up or needle-down button to raise the needle, so they need the power on for that step. Check your manual.
How to Thread a Sewing Machine Step by Step
Learning how to thread a sewing machine is mostly about following one path. If your machine has numbers or arrows along the thread path, follow them. The steps below match that path on a typical modern machine.
- Put the spool on the spool pin. Slide the thread onto the pin and add a spool cap. Brother says to choose the spool cap that best fits the spool size. Singer says a spool cap helps keep the thread from getting caught. Bernina suggests the horizontal pin for thread wound in straight, parallel rows.
- Pull the thread through the top thread guide. This is the small hook or slot on top of the machine, usually on the left.
- Draw the thread down the right channel. Hold the thread with both hands and pull it down the groove on the right side of the front panel.
- Go around the bottom and up the left channel. The thread turns around a guide at the bottom and comes back up the left groove.
- Thread the take-up lever. The take-up lever is the metal arm that moves up and down at the top of the left channel. Pull the thread from right to left through its slot or eye. Brother's threading guide says the same thing: right to left through the take-up lever.
- Go back down the left channel. Bring the thread straight down toward the needle.
- Slide the thread behind the needle bar thread guide. This is a small hook or wire just above the needle.
- Thread the needle from front to back. Both Brother and Singer say to pass the thread through the needle eye from front to back on their modern machines. Pull a few inches of thread through and lay it toward the back of the machine.
If your first stitches look loose or loopy, the thread may have missed the tension discs. Raise the presser foot and thread the whole path again.
Brother, Singer, and Janome Differences
The steps for how to thread a sewing machine are much the same on most modern machines, but each brand words them a little differently. Here is what each manual adds.
| Brand | Before threading | Thread path notes |
|---|---|---|
| Brother | Turn the handwheel toward you, counterclockwise, until the mark on the wheel points up. Brother warns the machine cannot be threaded if the needle is not raised. | Thread from right to left through the take-up lever, then from front to back through the needle. Many models have a built-in threader. |
| Singer | Raise the presser foot first to release the tension discs. Use a spool cap to keep the thread from catching. | Down the right channel and up the left, right to left through the slotted eye of the take-up lever, then front to back through the needle. |
| Janome | On the HD3000, raise the take-up lever to its highest point by turning the handwheel toward you. | Down the right slot, around the bottom guide from right to left, into the take-up lever eye, then behind the needle bar guide from the left. The HD3000 has a built-in threader. |
Some vintage machines thread differently. The Singer 221 Featherweight manual, for example, says to "thread needle from right to left." If you have an older machine, find the manual for that exact model before you start.
How to Use the Automatic Needle Threader
Once you know how to thread a sewing machine by hand, the needle threader saves a step. Many newer machines have a built-in needle threader, a small lever beside the needle with a tiny hook that pulls a loop of thread through the eye for you. Check your manual to see if your machine has one. The exact steps vary by brand and model, but they usually go like this.
- Raise the needle to its highest point. Brother and the Janome HD3000 also say to lower the presser foot before you use the threader.
- Pull the threader lever or knob down as far as it will go. A tiny hook passes through the needle eye.
- Hook the thread around the threader's guide and under the small hook.
- Release or turn the threader as your manual shows. A loop of thread comes through the eye.
- Pull the loop toward the back to bring the thread end through.
Brother's support page for the SM3701 says its threader does not work with 65/9, wing, or twin needles, or with transparent nylon (monofilament) or metallic thread. Limits vary by model. Thread those by hand, or use a handheld needle threader like the one in the tools list below.
How to Bring Up the Bobbin Thread
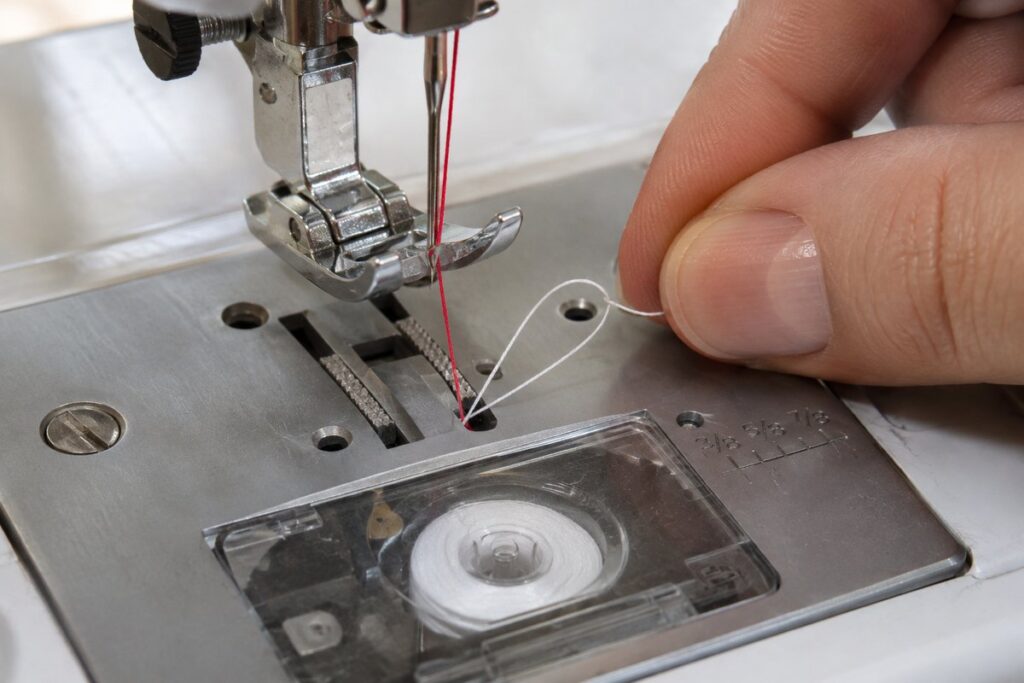
The last part of learning how to thread a sewing machine is the bobbin thread. The upper thread and the bobbin thread lock together to form each stitch. With a wound bobbin in place, bring its thread up to the top before you sew. Our guide on how to thread a bobbin covers winding it and putting it in.
- Hold the end of the upper thread lightly with your left hand.
- Turn the handwheel toward you one full turn, until the needle goes down and comes back up to its highest point.
- Gently pull the upper thread. A loop of bobbin thread comes up through the hole in the needle plate.
- Pull the loop out, then lay both threads under the presser foot and toward the back. The Janome HD3000 manual says to pull about 6 inches of both threads back under the foot.
Sewing Machine Threading Troubleshooter
When you thread a sewing machine and the stitches still look wrong, the cause is usually a missed step. Pick what you see below to find the likely cause.
Threading Troubleshooter
Pick what you see. These are the usual threading causes, based on Brother, Singer, and Janome troubleshooting guides.
Troubleshooter by QuiltGearHQ. Always check your own machine's manual.
Common Threading Mistakes
- Presser foot down while threading. Singer says to raise the presser foot to release the tension discs. With the foot down, the thread can miss the discs, which leaves the top thread loose.
- Missing the take-up lever. Brother says this will cause the thread to gather under the material.
- Needle in backward. The Singer 4423 manual says the flat side of the needle shank should face the back, which is true of most modern home machines. Janome lists an incorrectly inserted needle as a cause of skipped stitches and thread breaks.
- Wrong spool cap. Brother warns that if the spool or spool cap is set wrong, the thread may tangle around the spool pin, which can break the needle.
- Pulling the thread hard. Singer warns that pulling the thread with strong force can pull it out of the needle hole.
Each of these mistakes is a reason to learn how to thread a sewing machine in the right order. If your thread still breaks or your stitches look loose after you rethread, see our guides on why thread keeps breaking when quilting and how to fix tension on a sewing machine.
Tools That Help
These small helpers make it easier to learn how to thread a sewing machine. We checked them on Amazon on 4 Nov 2026. We have not tested them ourselves.
- Dritz Machine Needle Inserter and Threader. A small hand tool for threading the needle and holding a new needle while you insert it. The listing says it is made for specialty threads, so it helps when the built-in threader cannot. Sold by Amazon.
- SCHMETZ Universal Sewing Machine Needles, assorted sizes. A dull or bent needle can make good threading look bad. These assorted universal needles are the standard type for home sewing machines. Sold by SCHMETZ.
Thread quality matters too. Lint and weak spots can snag in the tension discs. Our guides to the best thread for machine quilting and the best needles for quilting cover what to look for.
Frequently Asked Questions
What is the first step to thread a sewing machine?
The first step in how to thread a sewing machine is to raise the presser foot. This opens the tension discs so the thread can sit between them. Then turn the handwheel toward you until the needle is at its highest point.
Do you thread a sewing machine needle front to back or side to side?
On most modern Brother and Singer machines, you thread the needle from front to back. Some vintage machines are different. The Singer 221 Featherweight, for example, threads from right to left.
Which way do you turn the handwheel?
Toward you. Brother, Singer, and Janome manuals all say to turn the handwheel toward you. Brother and Singer describe this as counterclockwise.
Why is thread bunching under my fabric?
A nest of thread under the fabric usually means the top thread has no tension. Common causes are threading with the presser foot down, which can let the thread miss the tension discs, or missing the take-up lever. Rethread the whole path with the foot up.
Do I need to rethread after changing the bobbin?
Not usually. You only need to bring the bobbin thread up again. If stitches look wrong after a bobbin change, rethreading the top thread is a quick first check.
Bottom Line: How to Thread a Sewing Machine
To thread a sewing machine, start with the presser foot up and the needle at its highest point. Follow the path from the spool through the top guide, down and up the channels, through the take-up lever, and into the needle from front to back. Then bring up the bobbin thread and lay both tails to the back. If you are still choosing a machine, our guide to the best sewing machine for quilting beginners is a good place to start.