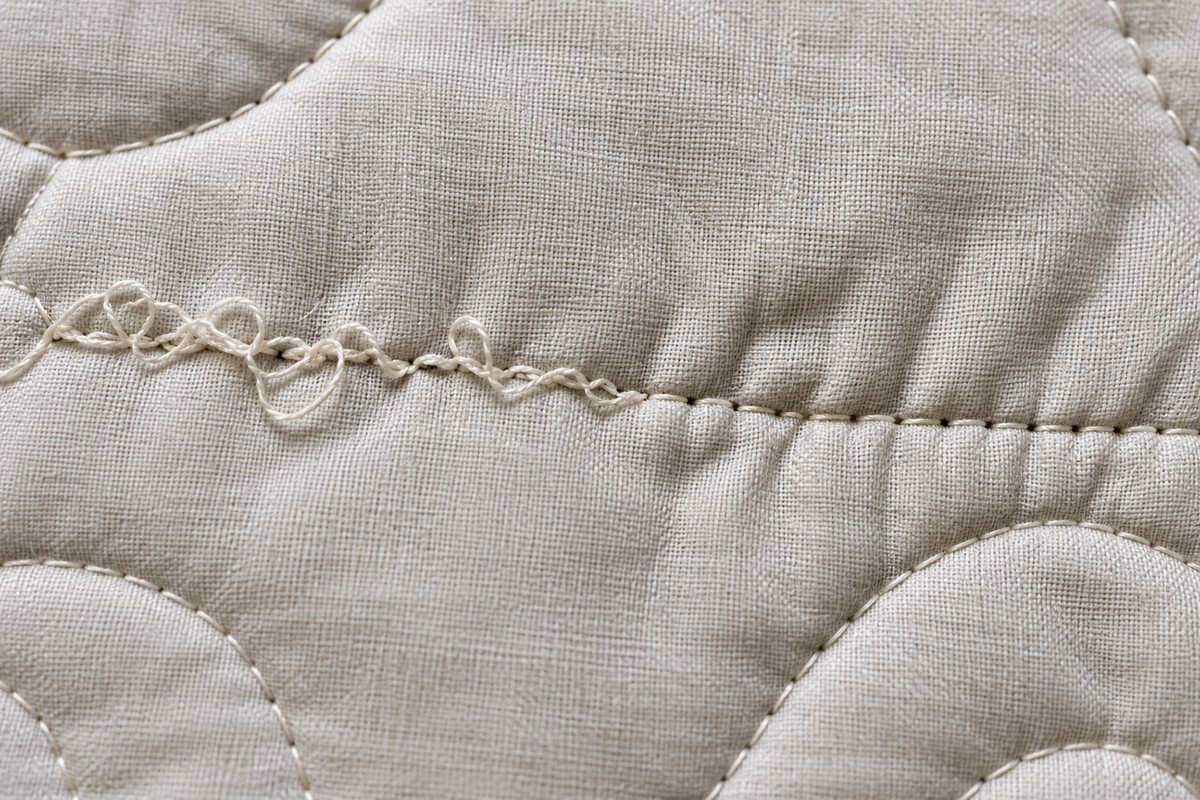
Uneven tension shows up right when you don't want it to, usually about two feet into a quilt top you spent a weekend piecing. The stitches look fine on the front, then you flip the fabric over and find a mess of loops on the back, or the thread's snapped twice in the last ten minutes, or the seam is puckering into little frowns. None of that means your machine is broken. Most tension trouble traces back to threading, needles, or a bobbin case that needs cleaning, not a mechanical failure.
This guide explains how to fix tension on sewing machine models built for quilting, walks through the causes that show up again and again, and lays out a diagnostic order that saves you from randomly cranking the tension dial and making things worse. It also covers when a quirk is just how your specific machine behaves versus when it's time to call a service tech.
Table of Contents
- How to Recognize Uneven Tension
- Top Tension vs. Bobbin Tension
- The Most Common Causes
- A Step-by-Step Diagnostic Approach
- Machine Quirk or Real Mechanical Problem?
- FAQ
How to Recognize Uneven Tension
Bad tension announces itself in a few specific ways, and knowing how to fix tension on sewing machine problems starts with recognizing which one you're seeing, since that's useful diagnostic information, not just a symptom to complain about.
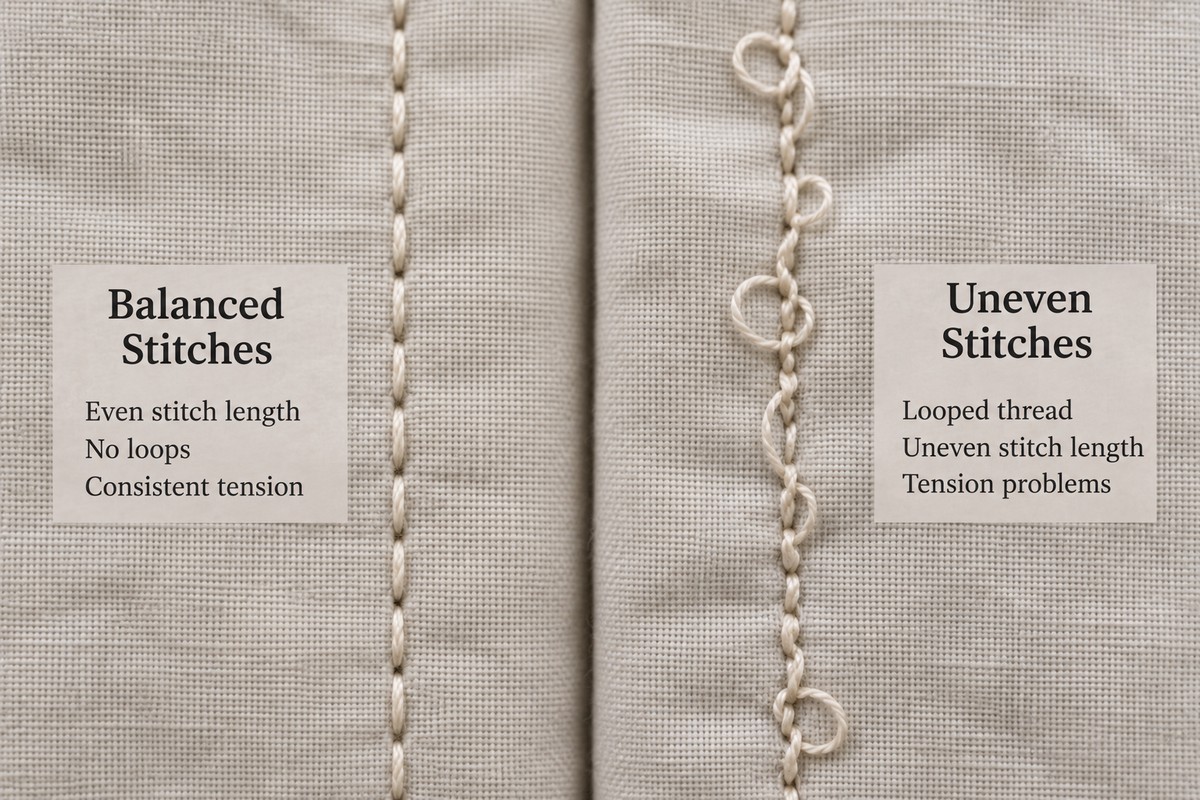
Loops on the back of the quilt. This is the classic sign, and it's specifically a top-tension problem. The bobbin thread gets pulled up through the fabric in loose loops because the top thread isn't holding its own tension against it. On free-motion quilting, this often looks worse than it is, since loops show up more on curvy stitching, but the cause is the same.
Loops or knots on the top of the quilt. Less common, but it happens, and it usually means the opposite: the bobbin tension is too loose relative to the top, so the top thread gets pulled down and bunches where it meets the bobbin thread.
Thread breaking repeatedly. If the top thread keeps snapping at the same point in your stitching motion, that's often tension set too tight combined with a needle issue, not tension alone. A too-tight top tension forces the thread to fight itself through the machine, and a burred or bent needle makes that fight worse.
Puckering along the seam. More common in piecing than free-motion work. When both tensions are cranked too tight relative to each other, the fabric gets pulled into small ridges as the threads compete for the same slack. It's easy to blame the fabric or batting, but check tension first.
Fraying or shredding thread. Often mistaken for a tension problem when it's really a needle or thread-quality issue. If the thread looks fuzzy or breaks into short fibers rather than snapping clean, check needle size and thread quality before touching the tension dial.
Test any of this on a scrap of the same fabric and batting you're using in the actual quilt, not a random square from the stash. Different weights genuinely behave differently under the same tension setting, so testing on the wrong material can send you chasing a problem that doesn't exist on the real quilt.
Top Tension vs. Bobbin Tension
Most home machines and a lot of longarms are built so the top tension gets adjusted often, right there on the dial or digital display, while the bobbin tension is set once during setup and left alone unless something specific goes wrong. Understanding this split is the first real step in learning how to fix tension on sewing machine models used for quilting.
Top tension controls how much resistance the top thread meets as it runs from the spool through the guides, through the tension discs, and down to the needle. This is the setting most quilters touch daily, and it's the first place to look because it's also the easiest to disturb. A stray bit of lint caught between the discs, thread that popped out of a guide, or a dial bumped mid-project can all throw it off without you noticing until the stitches show it.
Bobbin tension is set by a small screw on the bobbin case and should rarely, if ever, need adjusting for normal quilting cotton. Quilters working with specialty threads (metallics, monofilament, heavier weights) sometimes do need to adjust it, and a second bobbin case dedicated to that job, left alone otherwise, is a common workaround so the factory setting on the main case never gets disturbed.
Here's the part that saves the most frustration: if you see loops on the back, the instinct is to loosen the bobbin, but the fix is almost always on the top side first. Bobbin issues are real but less frequent, and that little screw is also easier to make worse without a clear read on what's wrong.
The Most Common Causes
Learning how to fix tension on sewing machine problems starts with understanding what causes them in the first place. Roughly in the order quilters run into them:
Incorrect threading. By far the most common cause, and the most overlooked because it feels too basic to be the answer. A skipped guide, thread not seated in the tension discs (some machines only engage the discs properly with the presser foot up), or a thread path that doubled back on itself will throw off every stitch downstream no matter what the dial says.
Wrong needle for the thread or fabric. A needle too fine for a heavier thread, or too heavy for lightweight fabric, changes how the thread passes through the eye and the fabric, and that reads as a tension problem even when the tension setting itself is fine. Match needle size to thread weight, and swap to a quilting or topstitch needle for heavier threads.
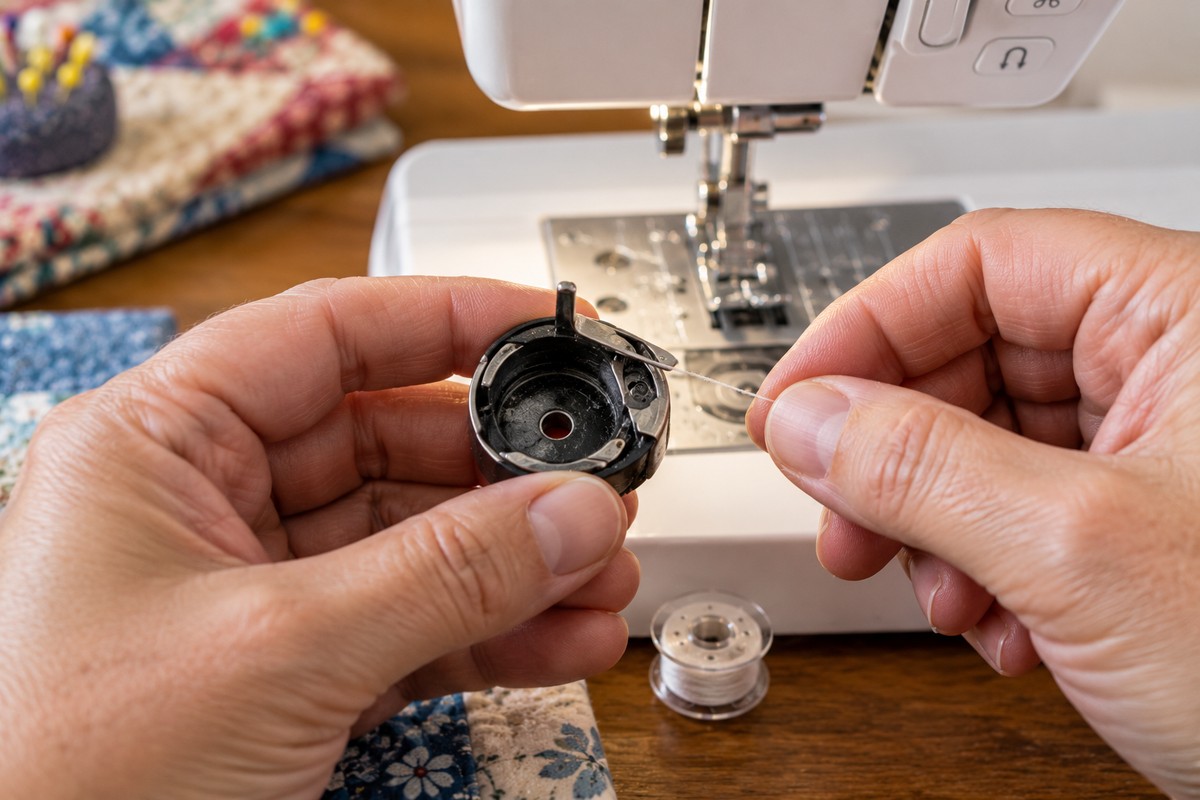
Dirty bobbin case or lint buildup. Lint collects around the tension discs and inside the bobbin case from normal use, often invisible until you pull the case out and look. That buildup changes resistance unevenly, producing the inconsistent stitching that makes tension problems so frustrating to chase. A quick brush-out as routine maintenance, not just when something's already wrong, prevents a lot of this.
Bent needle. A needle can bend slightly from hitting a pin or a thick seam intersection without an obvious visible bend. That changes the angle the thread meets the bobbin hook at, throwing off stitch formation in a way that mimics a tension issue. Needles are cheap. Replace one after any dropped bobbin case or hard hit, or roughly every one to two projects of heavy use.
Incorrect bobbin insertion. The bobbin has to go in facing the right direction, with the thread seated correctly under the tension spring or through the slot the manufacturer designed for it. Get either wrong and you'll see the exact symptoms of a bobbin tension problem without the tension setting itself being at fault.
Mismatched thread weights top vs. bottom. Running a heavy top thread against a much finer bobbin thread, or the reverse, puts uneven demand on both tension systems. This is common and often intentional in free-motion work, where a decorative top thread paired with a lighter bobbin thread is standard practice, but it means you need to adjust the tension for that pairing rather than leaving it at a default built around matched weights.
How to Fix Tension on Sewing Machine: Step-by-Step
Work through this in order rather than jumping straight to the tension dial when you're trying to figure out how to fix tension on sewing machine problems. This is the fastest reliable way to learn to fix tension problems for good, even though it feels slower at the start.
1. Test on scrap first. Use the same fabric, batting, and thread as the actual project. Stitch a few inches straight and a few inches of your actual free-motion pattern if that's what you're doing.
2. Check the top threading completely. Re-thread from the spool all the way to the needle, watching every guide the manual shows. Raise the presser foot first if your machine needs it to open the discs. Don't just glance at it. Run the whole path again.
3. Check the bobbin next. Remove the case, check for lint, brush it out, confirm the bobbin faces the correct direction, and confirm the thread sits properly in the tension spring or slot.
4. Check the needle. Look under good light or a magnifier for a bend or burr. When in doubt, replace it. This is the cheapest step in the whole process and often the actual fix.
5. Test again on scrap. If the stitch looks right, you found it. If not, move to the tension settings themselves, adjusting the top first in small increments and testing after each change rather than making one big adjustment and hoping.
6. Adjust bobbin tension only as a last resort, and only after steps 1 through 5 didn't fix it. If you do adjust the bobbin case screw, do it on a spare case rather than your machine's primary one, so you always have a known-good factory setting to return to.
Machine Quirk or Real Mechanical Problem?
Some machines just run a little differently than the manual describes, and quilters who've owned the same model for years learn its habits (a dial that reads best a half-number higher than "normal," a thread brand that always needs a slight tweak). That's a quirk, not a defect, and it's worth keeping notes on what settings work for your specific machine and thread combinations. Part of learning to fix tension quirks is simply logging what your machine likes.
A real mechanical problem is more likely when:
- Tension is inconsistent with the exact same thread, fabric, and settings that worked last time. Nothing changed.
- You've worked through the full diagnostic above more than once with no improvement.
- You hear a new noise, feel resistance in the handwheel, or the discs feel gritty or don't release when the presser foot lifts.
- The problem started right after a drop, a forced-clear jam, or a bobbin case that got knocked loose.
At that point, it's worth calling a qualified sewing machine service tech rather than continuing to guess. Tension discs can wear or bend internally in ways that aren't visible or fixable at home, and a tech with the right gauges can properly check spring tension and disc alignment. For a walkthrough of a simple rethread-needle-tension diagnostic order from an experienced machine quilter, see this tension troubleshooting guide.
For maintenance that prevents many of these problems before they start, see our guide on how to clean and oil a longarm quilting machine. And if what you're seeing is skipped stitches rather than tension trouble, the two get confused often enough to rule out. Our guide to fixing skipped stitches covers that separately, and both pair well with knowing how to fix tension on sewing machine setups generally.
Thread quality affects tension too. Our guide to the best thread for machine quilting covers the weights and fibers that run most smoothly. A dry or linty machine can also throw tension off, so see our guide to sewing machine oil for how to clean and oil it.
FAQ
Why is my bobbin thread showing on top of my quilt?
Usually the top tension is too loose relative to the bobbin, pulling bobbin thread up through the fabric. This is one of the most common reasons quilters search for how to fix tension on sewing machine setups. Check top threading first, then tighten the top tension slightly and retest on scrap.
Should I adjust the bobbin tension myself?
Most quilters can, carefully, with a small screwdriver and small incremental turns, but treat it as a last resort after ruling out threading, needle, and lint issues. Many keep a second bobbin case just for adjustments so the primary one stays at the factory setting. This is usually the last step in fixing sewing machine tension problems, not the first.
Does thread brand affect tension?
Yes. Different brands and fibers- cotton, polyester, metallic, monofilament- have different thickness and friction even at the "same" weight label, and switching brands can require a small tension adjustment even if nothing else changed, which is part of why how to fix tension on sewing machine questions rarely have one universal answer.
Why does my tension look fine on straight stitching but bad on free-motion quilting?
Free-motion quilting changes fabric speed and direction constantly, which puts different demands on the thread path than steady straight-line feeding. A tension setting that works for piecing can need a slight adjustment for free-motion work, and it's normal to have a different go-to setting for each, and knowing how to fix tension on sewing machine setups for both modes saves a lot of guesswork.
How often should I clean the bobbin case?
As routine maintenance, not just when something goes wrong. Quilters who sew often brush out lint every project or two. Even with less frequent use, check every few projects, since buildup is often invisible until it affects stitch quality. This single habit prevents more tension trouble than any other step in learning how to fix tension on sewing machine setups.
2 thoughts on “How to Fix Uneven Tension on a Quilting Machine”