Quilting is a dirty business. Every stitch drives thread and needle through three layers of fabric and batting, and that friction constantly throws off lint, much of it settling in the bobbin area where you can not see it building up. Left alone, that lint causes tension problems, skipped stitches, and eventually a jammed hook race. Learning how to clean a longarm quilting machine the right way, and oiling it afterward, is the single biggest thing you can do to keep an expensive machine running the way it did on day one.
Understanding how to clean longarm quilting machine basics does not require mechanical skill. The routine below matches what longarm manufacturers themselves recommend, and it takes a few minutes at the start or end of a quilting session, not hours.
Table of Contents
What You Will Need to Clean a Longarm Quilting Machine
- A small lint brush (usually included with the machine) or a can of compressed air, or better, a rechargeable cordless air duster
- Machine oil made for longarm or sewing machines, not household oil or WD-40
- A small scrap of leftover batting, about 3 inches square
- A lint-free, static-free cloth for the display and body
- A fresh needle, since needle changes are part of any complete how to clean longarm quilting machine routine
How Often to Clean and Oil a Longarm Machine
Knowing longarm quilting machine cleaning routines and following a regular schedule matters more than an occasional deep clean. Longarm maintenance follows a schedule, not a single one-time task. Manufacturers like Handi Quilter break it into four intervals, and the same pattern applies whether you are running a Handi Quilter, Grace, Juki, Bernina, Janome, or APQS machine.
- Every bobbin change. Brush or blow the lint out of the bobbin area before it has a chance to pack down.
- Every new project. Wipe down the tracks and wheels, and put in a fresh needle.
- Occasionally, depending on how much you quilt. Wipe the display and dust the body and table.
- Every two years or about 10 million stitches, whichever comes first. A full professional service at your dealer to re-lubricate the internal parts and check timing.
Step-by-Step: How to Clean Longarm Quilting Machine
1. Clean Out the Bobbin Area
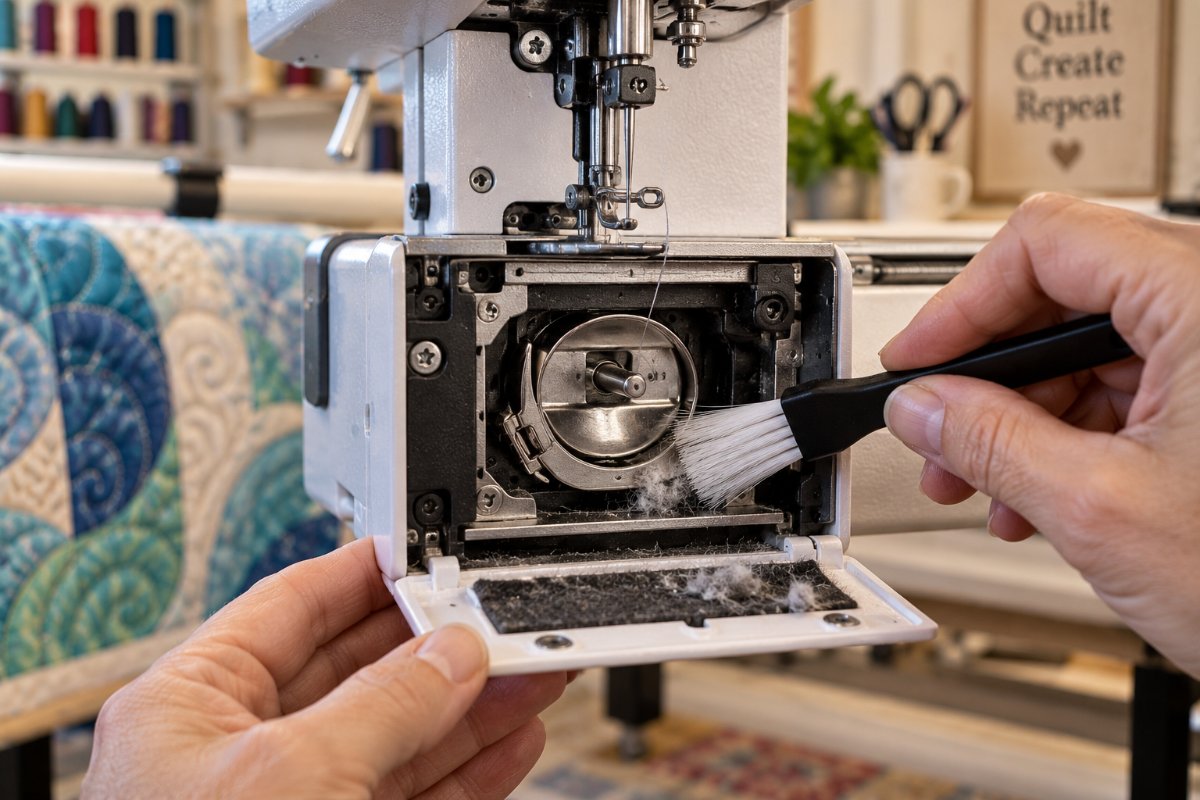
This is the first and most frequent step in longarm quilting machine cleaning routines. Remove the bobbin case and use a small brush to clear lint from the bobbin area, being careful around any wires if your machine has built-in lighting or an automatic thread cutter. If your machine's manual allows compressed air, use short bursts with a pause in between rather than one long blast. A long, continuous burst can push moisture into the area, and moisture on metal parts leads to rust. Check inside the bobbin case itself for lint too, not just the race.
2. Oil the Bobbin Race, One Drop Only
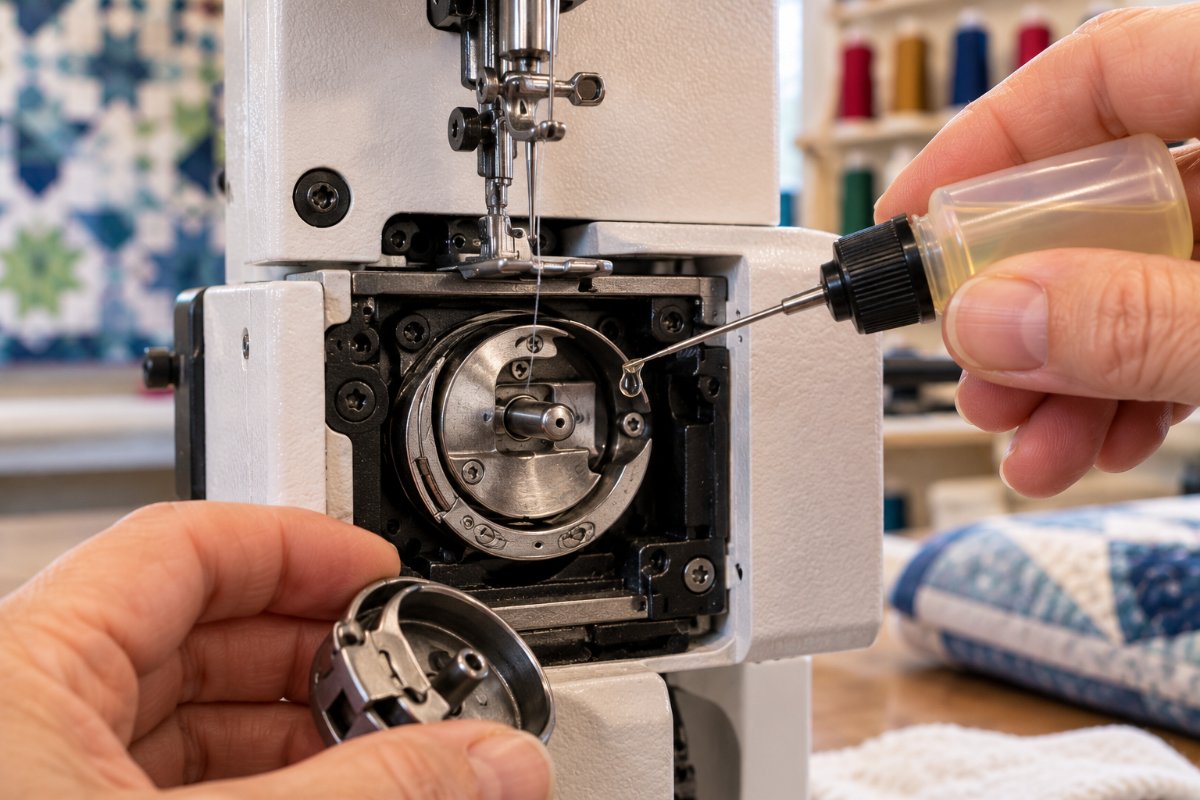
Once the lint is out, place a single small drop of oil on the bobbin race. On most longarm machines, this is the only place you oil. Check your owner's manual for the exact spot and use only the oil your manufacturer recommends. More is not better here. Over-oiling attracts lint and can seep onto your fabric.
3. Clean the Tracks and Wheels
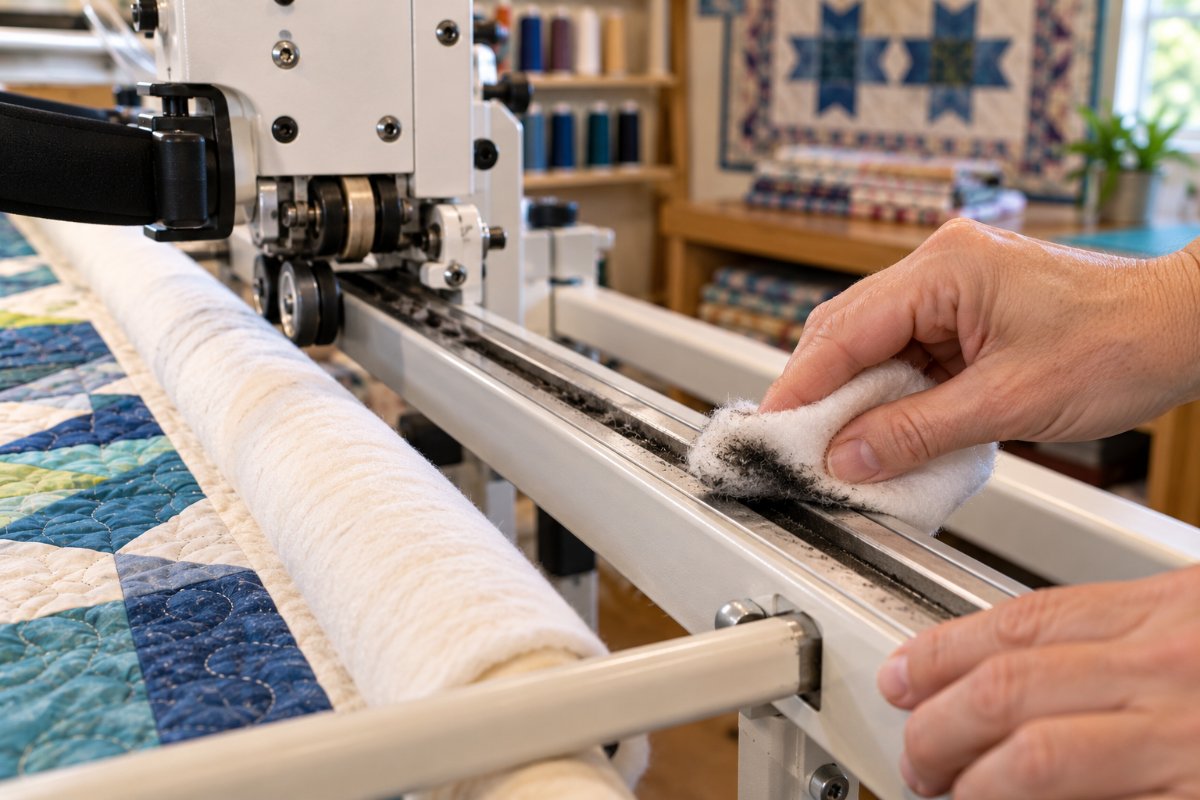
Take your scrap of leftover batting and wipe down the tracks on both the frame and the carriage. Then hold the batting against the bottom of each wheel and roll the machine back and forth so the whole rolling surface passes over it. What comes off will look black. That is not dirt from outside. It is just compressed lint the wheels have picked up off the tracks. While you are there, check for any thread wrapped around the wheels.
4. Change the Needle
The rule of thumb among longarm educators is that every quilt deserves a new needle. A needle does not have to feel dull to have developed a small burr, and a burred needle will shred or break thread in ways that look like a tension problem but are not. Do not wait for trouble to start. Swap the needle before it does.
5. Wipe Down the Display and Body
The final part of how to clean longarm quilting machine routines is the easiest. Use a lint-free, static-free cloth, the same kind you would use on a computer screen, to clean the display. Skip sprays and cleaners entirely. The cloth alone is enough. Dust the body of the machine and the tabletop, and if the machine sits idle for more than a day or two between sessions, a fitted sheet makes a surprisingly effective dust cover for the machine and most of the frame.
Common Mistakes That Damage a Longarm Machine
Most quilters who ask how to clean longarm quilting machine questions after something has already gone wrong trace the problem back to one of these five habits.
- Using WD-40 or household oil. These are not formulated for sewing mechanisms and can gum up the hook race over time. Use only machine oil made for longarm or sewing machines.
- Over-oiling. A single small drop in the specified spot is normally correct. Excess oil attracts lint and can transfer onto quilt tops.
- Skipping the tracks and wheels. Lint compressed onto the tracks eventually affects how smoothly the machine glides, which shows up as uneven stitching long before anyone thinks to check the tracks.
- Compressed air in long bursts. Short bursts with pauses avoid pushing moisture into the mechanism.
- Skipping the professional service interval. The internal lubrication and timing check at the two-year or 10-million-stitch mark is not optional maintenance. It is the single most important service a longarm gets in its life, and a machine that has sat unused for two years or more needs it before it is put back into regular use.
Tension problems often show up after cleaning and oiling. Our guide on how to fix tension on a sewing machine walks through the basics. For home machines, our guide to sewing machine oil explains which oils are safe to use and which to avoid.
Frequently Asked Questions
How long do longarm quilting machines last?
Quilters who follow proper how-to-clean longarm quilting machine habits tend to get the most life out of a machine. There is no single number every manufacturer publishes, but a longarm that gets the routine above- lint cleared every bobbin change, tracks wiped every project, and a professional service roughly every two years or 10 million stitches- is a machine built to be quilting for well over a decade. Most machines that fail early do so because of skipped maintenance, not normal wear.
Can I use rubbing alcohol to clean a longarm or sewing machine?
A big part of how to clean longarm quilting machine correctly is knowing what not to use. Stick to a dry, lint-free cloth for the display and body, and skip alcohol, glass cleaner, or any other spray on the machine itself. Some plastics and painted finishes can be affected by solvents, and the areas that need cleaning- the bobbin area, race, and tracks- are handled with a brush, air, and a scrap of batting instead, not liquid cleaners.
What is the average cost of a longarm quilting machine?
Whatever machine you own, how to clean longarm quilting machine habits protect that investment. Longarm and mid-arm machines span a wide range, from entry mid-arm setups in the low thousands to studio-grade longarm systems with computerized stitch regulation that run well into five figures once you add a frame. See our guide to the best longarm quilting machines for real examples across that range and what separates the budget tier from the professional tier.
Do I need a new needle every time I clean the machine?
Not every cleaning, but every project. This is a common question quilters have about how to clean longarm quilting machine habits. Cleaning the bobbin area happens every bobbin change, which is more frequent than swapping a needle. The needle change is tied to the quilt, not the bobbin, since a burred needle from finishing one quilt is the most common hidden cause of thread shredding on the next.
Bottom Line
Knowing how to clean longarm quilting machine parts the right way comes down to four habits on four different schedules: brush the lint out of the bobbin area every time you change a bobbin, wipe the tracks and wheels and swap the needle with every new project, dust the body and display occasionally, and get a professional service every two years or 10 million stitches. Machines that get this routine keep running smoothly for years. Machines that skip it are the ones that show up needing an expensive repair. For more on choosing the right machine in the first place, see our guide to the best longarm quilting machines.
3 thoughts on “How to Clean and Oil a Longarm Quilting Machine”