
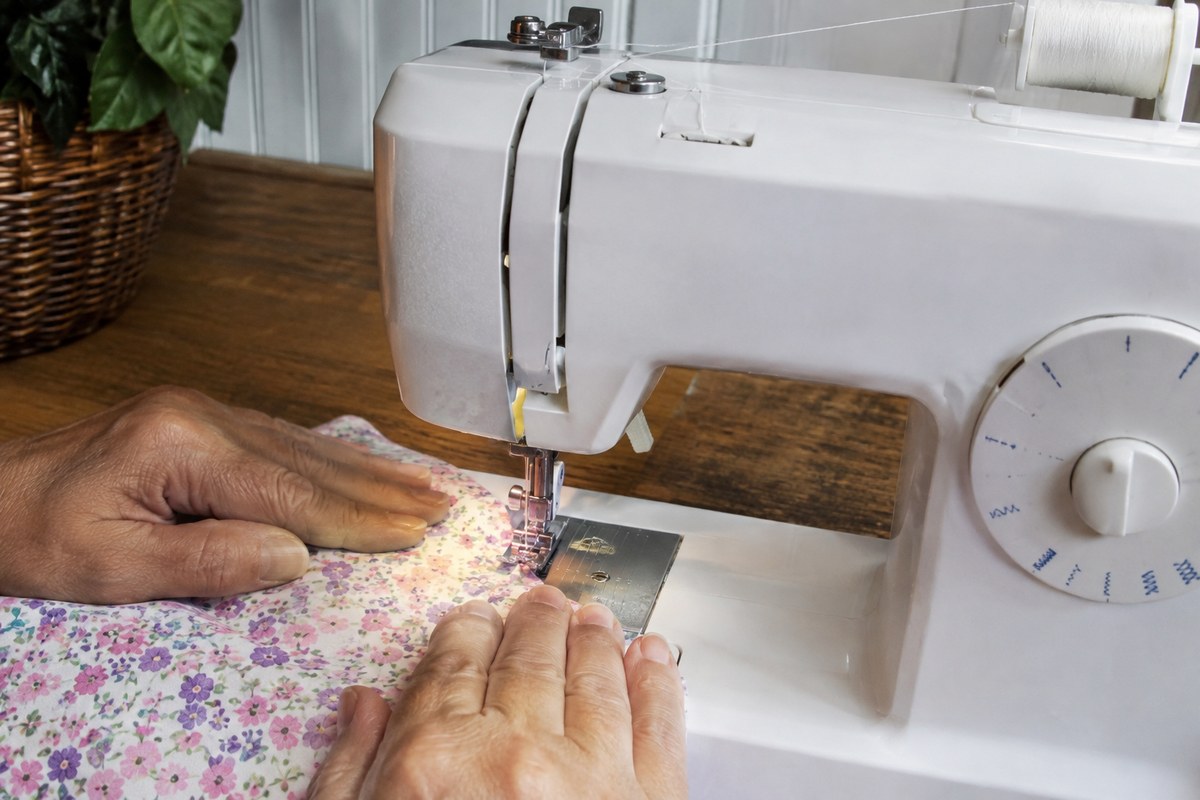
Here is how to use a sewing machine in plain terms. Thread the top and the bobbin, turn the handwheel toward you until the needle is at its highest point, and slide your fabric under the presser foot. Lower the foot, hold the two thread tails, and gently press the foot pedal. Let the machine pull the fabric through while your hands only steer it. Stop with the needle down when you need to turn, and finish each seam with a few locking stitches.
QuiltGearHQ is a participant in the Amazon Services LLC Associates Program, an affiliate advertising program designed to provide a means for sites to earn advertising fees by advertising and linking to Amazon.com.
That is the whole loop, and every project repeats it. The rest of this guide fills in the parts that trip up new sewists: what each control does, how fast to go, how to keep a straight line, and what to do when a nest of thread appears under your fabric. Because this is a quilting site, we also cover the quarter-inch seam, the one measurement almost every quilt pattern depends on.
Table of Contents
The Parts You Will Use Every Time
A new machine can look like a dashboard full of mystery dials, but learning how to use a sewing machine starts with only about a dozen parts. Most machines put them in the same places, so once you learn them on one model, the next one feels familiar. Your manual has a labeled drawing, and it is worth five minutes with it before you sew your first seam.
- Spool pin. Holds the thread spool.
- Thread guide. First stop on the top thread path.
- Thread take-up lever. Rises and falls to pull each stitch snug.
- Upper tension dial. Sets how firmly the tension discs grip the top thread. Brother calls it the upper tension-control dial.
- Needle. Held by the needle clamp screw.
- Presser foot. Holds the fabric flat. Its lever is usually behind or beside the needle area.
- Needle plate and feed dogs. The plate has seam guide lines. The feed dogs move the fabric from below.
- Bobbin area. Under the needle plate, either drop-in or front-loading.
- Handwheel. On the right side. Turn it toward you by hand on most machines.
- Stitch controls. Stitch selector (Brother's pattern selection dial), stitch length, and on many machines stitch width and a reverse sewing lever.
| Part | What it does |
|---|---|
| PartSpool pin and thread guides | What it doesHold the top thread and lead it along a set path to the needle. |
| PartTension discs | What it doesTwo small plates inside the machine that grip the top thread. They only close properly when the presser foot is down, which is why the foot must be up while you thread. |
| PartTake-up lever | What it doesThe arm that moves up and down above the needle. It pulls each stitch snug. |
| PartNeedle and needle clamp | What it doesThe needle carries the top thread through the fabric. The clamp screw holds it in place. |
| PartPresser foot and lever | What it doesThe foot presses the fabric flat while you sew. The lever, usually behind the needle area, raises and lowers it. |
| PartFeed dogs | What it doesThe small toothed bars under the presser foot. They move the fabric toward the back of the machine, one stitch at a time. |
| PartNeedle plate | What it doesThe metal plate under the foot. Most have engraved seam guide lines to the right of the needle. |
| PartBobbin and bobbin case | What it doesThe small spool of thread under the needle plate that forms the bottom half of each stitch. |
| PartHandwheel | What it doesThe wheel on the right side. Turning it by hand raises and lowers the needle slowly. |
| PartStitch, length, and width controls | What it doesChoose the stitch pattern, how long each stitch is, and how wide a zigzag swings. |
| PartReverse lever or button | What it doesMakes the machine sew backward for a few stitches to lock a seam. |
| PartFoot pedal | What it doesControls speed. The harder you press, the faster the needle moves. |
Two of these deserve a second look. The handwheel should always turn toward you. Brother, Singer, and Janome manuals all say this, so it is a good habit to build from day one. The feed dogs matter because they do the pushing for you. New sewists often try to pull the fabric through, and that fights the feed dogs, can bend the needle, and makes crooked stitches.
Set Up Before You Sew
A little setup saves a lot of frustration. Taking a few minutes to do this is a big part of using a sewing machine well. Put the machine on a sturdy table at a height where your forearms rest comfortably, with good light over the needle. Plug in the foot pedal and set it so your foot can rest on it without stretching. If your machine has a speed slider, which many computerized models do, set it to slow for now.
Next, check the needle. A fresh needle sized for your fabric makes a bigger difference than most beginners expect. For quilting cotton, SCHMETZ recommends its Quilting needle size 75/11 for piecing with 50-weight thread. A universal needle also works for general sewing. If you are not sure how old the needle in your machine is, change it now. Turn the machine off first, as Brother's manuals direct, so the needle cannot move while your fingers are near it. Our guide to the best needles for quilting explains the sizes and types.
If you want a card of needles to start with, this is the SCHMETZ needle made for piecing. We checked the Amazon listing on 14 Nov 2026. We have not tested it ourselves.

Then thread the machine. Use the same good-quality thread on top and in the bobbin, and raise the presser foot before you start so the thread can drop between the tension discs. If you have not threaded your model before, follow our step-by-step guides on how to thread a sewing machine and how to thread a bobbin. When both are done, bring the bobbin thread up through the needle plate and pull both tails toward the back of the machine, under the foot, about 4 inches long.
Last, grab a few scraps of the fabric you plan to use. Two layers of plain quilting cotton are ideal. Every test in this guide happens on scraps first, so mistakes cost nothing.
Quick safety checks
- Turn the machine off before you change the needle or the presser foot. Brother's manuals say this for both.
- Keep your fingers clear of the needle while the machine is on, and keep your foot off the pedal while your hands are near it.
- Do not pull or push the fabric while sewing. Let the feed dogs move it.
- Turn the machine off and unplug it before cleaning or when you walk away.
Check your own manual for
- Which way the needle goes in (most home machines take it with the flat side to the back).
- Your bobbin type, and which way the bobbin should turn.
- Which way to turn the handwheel (toward you on most machines).
- Where the presser foot lever, reverse control, and any lock stitch or needle up and down buttons are.
- Whether your feed dogs can be lowered, and where that control is.
How to Use a Sewing Machine Step by Step
With the machine threaded, sewing a seam follows the same steps every time. This is how to use a sewing machine for a basic seam. The list below is written for a straight stitch on two layers of cotton, which is what most quilt piecing uses.
- Choose a straight stitch. Select the straight stitch with the needle in the center position. Set the stitch length to about 2.5 for practice. The length section below covers what the number means.
- Raise the needle and the presser foot. Turn the handwheel toward you until the needle is at its highest point, then lift the presser foot lever.
- Place the fabric. Lay the two layers right sides together and slide them under the foot. Line up the raw edge with the seam guide you want to follow, and set the top edge just under the needle.
- Lower the presser foot. This clamps the fabric and closes the tension discs. Sewing with the foot up is a common cause of a thread nest under the fabric.
- Hold the thread tails. Hold the two tails lightly toward the back for the first few stitches. Brother's manuals tell you to hold the upper thread lightly as you start, which helps keep the tails from being pulled down into the bobbin area.
- Press the pedal gently. Start slowly. Let the feed dogs move the fabric while your hands rest flat on either side of the foot and steer.
- Lock the start. After two or three stitches, press the reverse lever or button and sew back over them, then continue forward. If your machine has a lock stitch button, you can use that instead. (Quilt piecing often skips this step. See the section on starting and ending seams.)
- Sew to the end and lock again. Stop at the edge of the fabric, sew a few reverse stitches, and then sew forward to the edge once more.
- Raise the needle and the foot. Turn the handwheel toward you until the needle is up and the take-up lever is at its highest point. Lift the presser foot.
- Remove the fabric and cut the threads. Pull the fabric straight back and away from you, then cut the threads, leaving tails of a few inches so the next seam starts easily. Many machines have a small thread cutter on the side.
Step 9 is easy to skip and causes a lot of grief. If the needle is not all the way up when you pull the fabric out, the top thread can still be caught in the bobbin area. Pulling then unthreads the needle or yanks a loop of thread out of shape. Ending with the needle up, and the take-up lever up with it, keeps the next seam from starting tangled.
Guiding the Fabric: Speed, Straight Lines, and Corners
Once you know how to use a sewing machine for a basic seam, the next skill is control. Most of what makes a seam look good happens in your hands and your right foot, not in the machine. A steady, moderate speed is easier to control than bursts of fast sewing followed by sudden stops. If the pedal feels jumpy, rest your heel on the floor and press with the ball of your foot. A speed slider set to the middle of its range also takes the edge off.
Keep your eyes on the edge of the fabric and the seam guide, not on the needle. The needle stays in one place, so the seam lands wherever the fabric edge runs. Watching that edge against the guide line on the needle plate, or the edge of a quarter-inch foot, is what keeps a seam straight. Your hands should sit flat on the fabric, one in front of the foot and one to the left, guiding gently. They steer the fabric. They do not push it in or pull it out. Brother's manuals warn that stretching or pulling the fabric while sewing can damage the needle, and it is also a common reason beginner seams wander or pucker.
To turn a corner, sew up to the turning point and stop with the needle down in the fabric. Turning the handwheel toward you gets the needle exactly where you want it. Raise the presser foot, turn the fabric around the needle, lower the foot, and keep sewing. This move is called pivoting, and it gives a sharp, unbroken corner. Many computerized machines have a needle-up-and-down button that makes it even easier by stopping with the needle down every time you take your foot off the pedal.
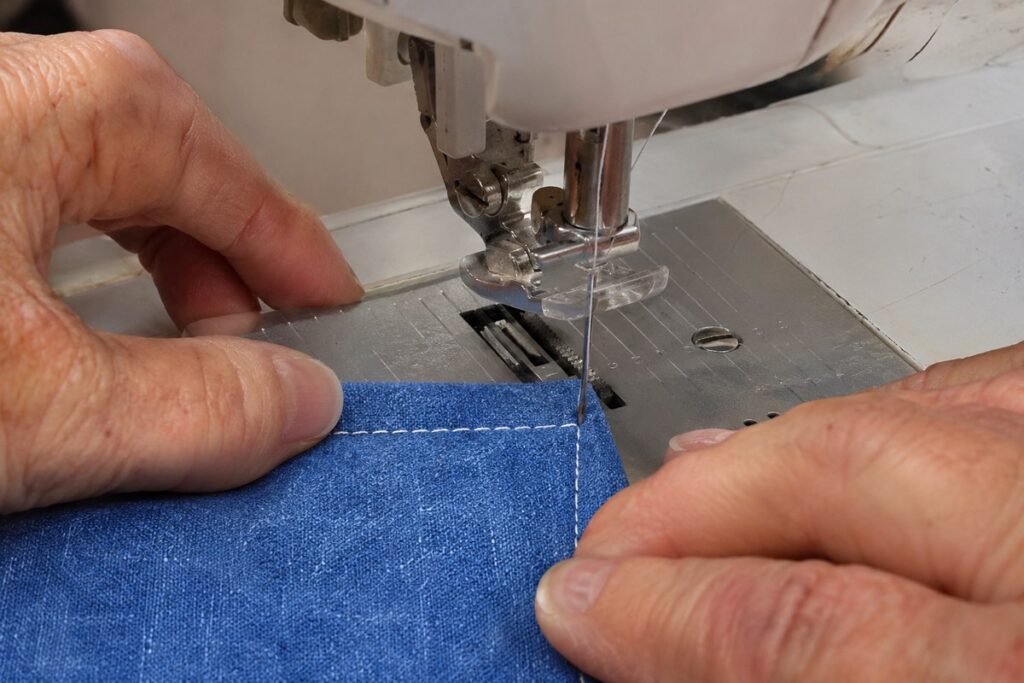
- Stop with the needle down exactly at the corner, with the presser foot still down.
- Raise the presser foot and turn the fabric a quarter turn around the needle. The needle holds your place.
- Lower the presser foot and sew the next side. The corner stays sharp and unbroken.
Pins deserve a word too. Pin across the seam line with the heads to the right, where you can reach them, and pull each pin out just before it reaches the presser foot. Sewing over pins can bend or break a needle.
Setting Stitch Length (With a Quick Converter)
Stitch length is the distance the fabric moves between stitches. Most modern machines show it in millimeters, often with a default around 2.5. Older machines and many quilt patterns talk in stitches per inch instead, so it helps to know how the two line up. The math is simple. Divide 25.4, the number of millimeters in an inch, by the stitches per inch. Twelve stitches per inch works out to about 2.1 millimeters.
For quilt piecing, many quilters shorten the stitch to around 2.0. A shorter stitch holds the seam together at the cut edges, which matters because pieced seams are usually not backstitched and get crossed by other seams later. For general sewing and practice, 2.5 is a comfortable middle. Longer stitches, around 4 or more, are for basting, meaning temporary stitches you pull out later. They also help with thick layers.
| Setting | Typical use |
|---|---|
| SettingAbout 2.0 mm (about 12 to 13 stitches per inch) | Typical useQuilt piecing. Many quilters shorten the stitch a little for seams that will not be backstitched. |
| SettingAbout 2.5 mm (about 10 stitches per inch) | Typical useGeneral sewing and practice. A common default on many machines. |
| SettingAbout 4 mm or longer (about 6 stitches per inch or fewer) | Typical useBasting, which means temporary stitches you will pull out later. Also helpful on thick layers. |
Treat these as starting points, not rules. Fabric, thread, and your machine all change what looks right, so sew a few inches on a scrap and adjust from there.
Stitch Length Converter
Type a number in either box. It converts between stitches per inch and the millimeter setting most machines use.
Converter by QuiltGearHQ. Machines round to their own steps, so pick the closest setting your machine offers.
Sewing an Accurate Quarter-Inch Seam
For quilters, learning how to use a sewing machine also means learning one measurement. Quilt patterns assume a quarter-inch seam allowance, the distance between the stitching and the cut edge. Every block, border, and finished size is based on it. A seam off by a thread or two doesn't look like much, but across a block with eight seams, the error adds up, and blocks stop matching.
There are three easy ways to set up a quarter-inch guide on your machine. A quarter-inch presser foot is the simplest. It is designed so the fabric edge runs along its side and the stitching lands a quarter inch in, as long as the needle is in the position the maker specifies. Foot shapes and needle positions vary, so treat a new foot as a starting point and test it.
Some machines come with one, and most makers sell one that fits their models. The second is the engraved guide on the needle plate, if your plate has a quarter-inch line. The third works on any machine. Lower the needle onto the quarter-inch mark of a ruler, then stick a strip of painter's tape on the machine bed along the ruler's edge. Keep the tape off the feed dogs and away from any moving parts. That tape edge becomes your guide.
Whichever guide you use, check it with a test seam before you trust it. Many quilters sew a scant quarter inch, which is a thread or two narrower than a true quarter. The reason is that pressing the seam to one side uses up a little fabric in the fold.
The three-strip test shows what your setup gives. Cut three strips 2 1/2 inches wide, sew them together along their long edges, and press the seams. With exact quarter-inch seams, the pressed unit measures 6 1/2 inches across. That is its unfinished size, because the two outer edges still carry their own seam allowances, and the center strip measures 2 inches between the seam lines. Once that unit is sewn into a quilt, it finishes at 6 inches.
If your unit comes out smaller than 6 1/2 inches, your seams are too wide. If it is a little bigger, they are narrower than a quarter inch, which is fine if you are aiming for a scant seam. Move the tape or needle position slightly and test again until the numbers match your pattern.
| Cut width of each strip | 2 1/2 inches |
|---|---|
| Seam allowance on each joined edge | 1/4 inch (2 seams) |
| Pressed unit, unfinished | 6 1/2 inches wide |
| Center strip, between seam lines | 2 inches |
| Each outer strip, visible in the unit | 2 1/4 inches (its outer edge still has a seam allowance) |
| Finished width, once sewn into a quilt | 6 inches, with each strip showing 2 inches |
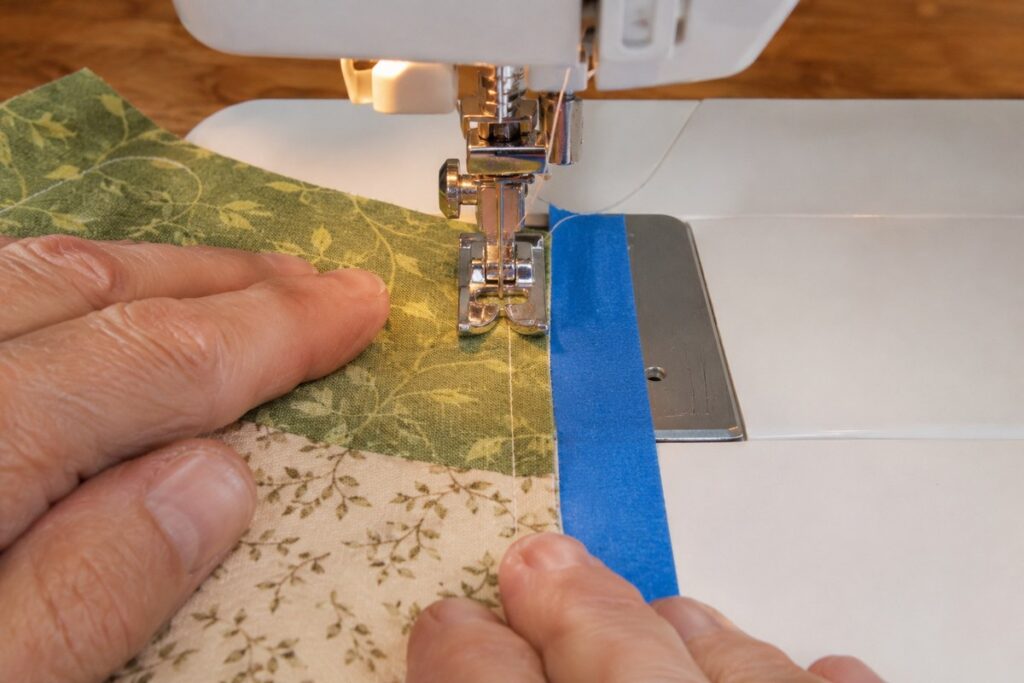
How to set and check a tape guide
- Lower the needle onto the quarter-inch mark of a ruler, with the ruler running straight toward you.
- Stick painter's tape along the ruler edge, clear of the feed dogs and moving parts.
- Sew a test seam on two scraps with the cut edge against the tape, then press it.
- Measure from the stitching to the cut edge, or do the three-strip test above.
- Move the tape slightly and test again until the seam matches your pattern.
Starting and Ending Seams
In garment sewing, you lock the start and end of every seam with a few reverse stitches, called backstitching. Quilt piecing usually works differently. Most pieced seams are crossed by another seam later, which holds them in place, so many quilters skip backstitching and use a slightly shorter stitch instead. Seams that end at an outside edge of the quilt top, or that will not be crossed, are worth locking. Some machines have a lock stitch button that ties off the seam in place without sewing backward.
When you have several pairs to sew, you can feed them through one after another without lifting the foot or cutting the thread. This is called chain piecing. You end up with a string of pieces joined by short lengths of thread, which you snip apart at the end. It saves thread, saves time, and helps keep the machine from pulling the start of each seam down into the needle plate, because the next piece is already under the foot.
Good First Practice
The fastest way to get comfortable using a sewing machine is to sew a lot of lines that don't matter. A classic warm-up is to sew on lined paper with no thread in the needle. You follow the lines, turn corners, and stop on a mark. The holes show exactly where you wandered. Use an old needle for this, because paper dulls a needle quickly, and change it before you sew fabric again.
Then move to fabric scraps. Sew straight lines a quarter inch from the edge, then try curves, then pivot around a square. When the lines look steady, sew a simple project. A nine-patch block or a set of pot holders uses straight seams only and gives you a finished piece at the end. Our guide on how to make a quilt walks you through your first quilt, from cutting to binding, and a beginner quilt kit takes the guesswork out of choosing fabric.
Printable Practice Sheet
Print it on plain letter paper and sew along the lines with no thread in the needle.
The sheet has five straight lines, two corner paths for pivoting, and two gentle curves. Use an old needle, because paper dulls a needle quickly.
Practice sheet by QuiltGearHQ. Free to print for personal use.
When Something Goes Wrong
Most beginner problems have more than one possible cause, so start with the safe, simple checks before you touch the tension dial. Rethread the top thread with the presser foot up, check that the bobbin is the right type and seated correctly, and put in a fresh needle. The table below covers what new sewists run into most. When in doubt, remove the threads, raise the presser foot, and rethread the top and bottom from scratch. It solves more problems than anything else.
| What you see | Possible causes | First checks |
|---|---|---|
| What you seeA tangled nest of thread under the fabric | Possible causesThe top thread is not sitting in the tension discs, often because it was threaded with the presser foot down. A bobbin that is not seated correctly can also cause it | First checksRaise the foot and rethread the top thread completely |
| What you seeThe fabric will not move | Possible causesThe presser foot is up, or the feed dogs are lowered | First checksLower the foot. Check that the feed dogs are raised. Your manual shows where the drop feed control is, if your machine has one |
| What you seeSkipped stitches | Possible causesA dull, bent, or wrongly inserted needle, or the wrong needle for the fabric | First checksPut in a fresh needle, flat side to the back on most home machines, pushed all the way up |
| What you seeThe needle comes unthreaded at the start | Possible causesThe needle was not at its highest point, or the tail was too short | First checksStart with the needle up and leave 4 inch tails, held for the first few stitches |
| What you seeThe top thread keeps breaking | Possible causesThreading error, a damaged needle, or poor thread | First checksRethread, change the needle, and try a better thread. See why thread keeps breaking |
| What you seeLoops or loose stitches on one side | Possible causesTension or threading, usually the top thread | First checksRethread first, then see how to fix tension |
| What you seeThe needle broke | Possible causesPulling the fabric, sewing over a pin, or a loose needle | First checksTurn the machine off, replace the needle, and let the feed dogs do the work |
What the common problems look like
If the machine jams solid, stop and do not force the handwheel. Turn it off, raise the presser foot, cut the threads above the fabric, and gently free the fabric. Then remove the bobbin and clear any thread caught in the bobbin area before you rethread.
Simple Care That Keeps It Sewing
Part of knowing how to use a sewing machine is knowing how to look after it. A machine does not need much, but it does need a few habits. Change the needle often. SCHMETZ, a major needle maker, gives eight hours of sewing as a general rule of thumb, and says a dull needle shows up as broken threads, skipped stitches, puckered fabric, or a popping sound as it goes through the fabric.
Lint builds up quickly when you sew cotton. Every so often, turn the machine off, remove the bobbin, and brush lint out of the bobbin area and around the feed dogs. Your manual shows how to remove the needle plate if your model allows it. Oil is model-specific. Some machines need a drop in set places, and others are designed not to be oiled at all, so follow the manual. Our guide to sewing machine oil explains what to use when your machine does need it.
When you finish for the day, turn the machine off, unplug it, and put the cover on. A cover keeps dust out of the thread path.
Frequently Asked Questions
How do you use a sewing machine for the first time?
Read the quick start pages of your manual, then thread the top and the bobbin with the presser foot raised. Set a straight stitch at about 2.5, place two scraps of cotton under the foot, lower the foot, hold the thread tails, and gently press the pedal. Practice straight lines on scraps before you start a project.
Which way should the handwheel turn?
Toward you. Brother, Singer, and Janome manuals all say to turn the handwheel toward you. Brother describes this as counterclockwise.
Why does my sewing machine make a nest of thread under the fabric?
A nest under the fabric usually means the top thread is not in the tension discs. This often happens when the machine was threaded with the presser foot down, or when you start sewing without lowering the foot. Raise the foot, rethread the top thread from the spool to the needle, and try again on a scrap.
What stitch length should I use for quilting?
For piecing quilt blocks, many quilters use about 2.0 millimeters, which is close to 12 or 13 stitches per inch. For general sewing, 2.5 is a common middle setting. Basting uses long stitches, around 4 millimeters or more.
Do I need to backstitch when piecing a quilt?
Usually not. Most pieced seams are crossed by another seam later, which holds them, so many quilters use a slightly shorter stitch and skip backstitching. Lock seams that end at the outside edge of the quilt top or that will not be crossed.
How often should I change my sewing machine needle?
SCHMETZ gives about eight hours of sewing as a general rule of thumb. Change it sooner if you see skipped stitches, broken threads, or puckering, or if you hear a popping sound as the needle goes through the fabric.
How do I get a quarter-inch seam on any machine?
Use a quarter-inch presser foot if your machine has one. If not, lower the needle to the quarter-inch mark on a ruler and place a strip of painter's tape on the machine bed along the ruler edge. Test by sewing three 2 1/2 inch strips together. The pressed unit should measure 6 1/2 inches wide.
Where to Go Next
Once straight seams feel natural, the next skills build on them. Learn your machine's threading path by heart with our guides on threading the top thread and winding and inserting a bobbin. If you are still choosing a machine, our list of the best sewing machines for quilting beginners focuses on features that help new quilters, and our comparison of mechanical and computerized machines explains the trade-offs. When you move on to quilting through layers, a walking foot is a popular first attachment.