
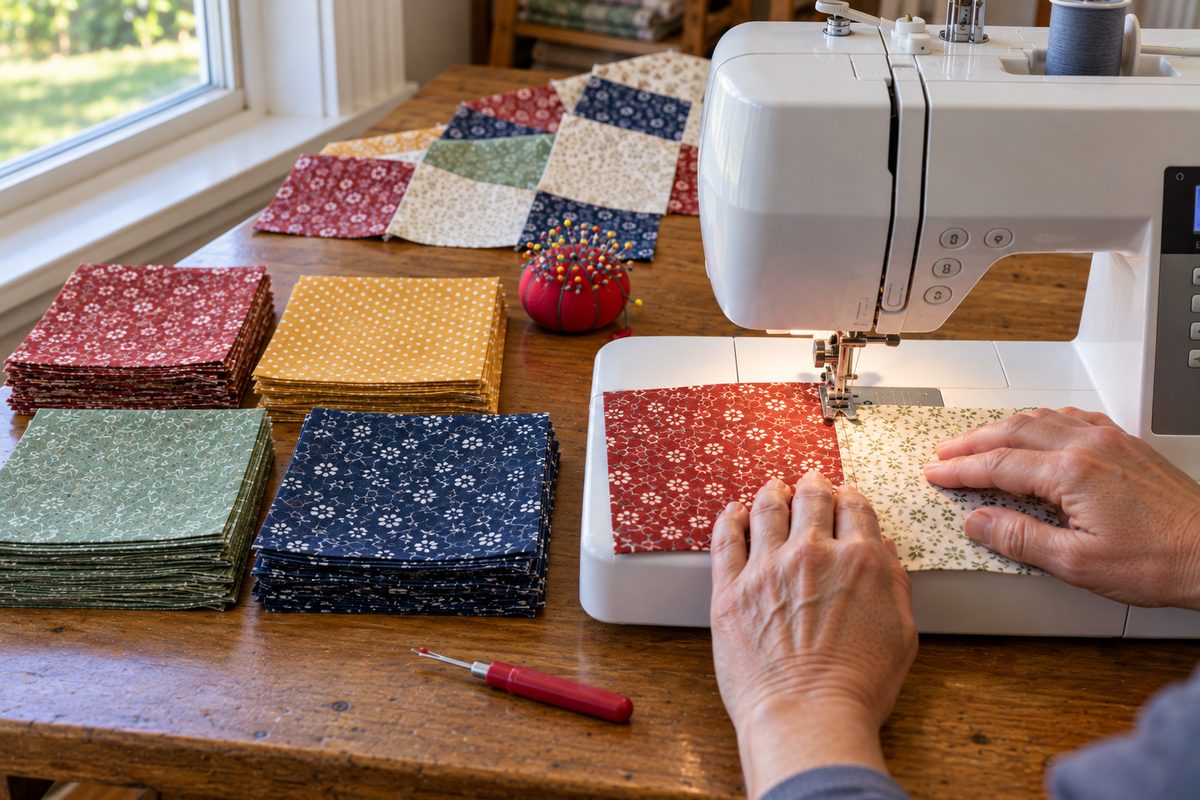
Here is how to make a quilt. Cut fabric into squares, sew them into rows with a 1/4-inch seam, press the seams, and sew the rows together to make the quilt top. Then layer the top with batting and backing, baste the layers, quilt through all three, trim the edges square, and finish them with binding. A simple squares quilt is the easiest first project because every seam is straight and every piece is the same size.
This guide shows how to make a quilt from start to finish on a home sewing machine. It explains quilters' terms, shows which seams to press which way, and includes a free planner that calculates the layout, cutting list, and how much fabric, batting, and binding to buy.
Table of Contents
How to Make a Quilt in 9 Steps
- Choose and prepare your fabric. Quilting cotton, pressed flat.
- Cut the squares. Cut strips across the fabric, then cut the strips into squares.
- Sew the squares into rows with a 1/4 inch seam.
- Press the seams, alternating the direction from row to row.
- Sew the rows together to finish the quilt top.
- Make the quilt sandwich and baste it. Pin or spray the backing, batting, and top together.
- Quilt the layers together with straight lines and a walking foot.
- Square up and bind the edges.
- Label and wash it.
Quilt Words to Know First
Patterns and videos use these words all the time. Knowing them makes every other step easier.
| Word | What it means |
|---|---|
| Quilt top | The decorative front of the quilt, made from pieces of fabric sewn together. |
| Piecing | Sewing fabric pieces together to make the quilt top. |
| Seam allowance | The fabric between the stitching line and the cut edge. Quilters use 1/4 inch. |
| Batting | The soft middle layer that gives a quilt its warmth and puff. Also called wadding. |
| Backing | The large piece of fabric on the back of the quilt. |
| Quilt sandwich | The three layers stacked together: backing, batting, and quilt top. |
| Basting | Holding the three layers together with pins, spray, or long stitches so they don't shift. |
| Quilting | The stitching that goes through all three layers and holds them together for good. |
| Binding | The narrow strip of fabric that wraps and covers the raw outer edges. |
| Width of fabric (WOF) | Cutting across the fabric from one finished edge to the other. |
| Selvage | The tightly woven finished edges of the fabric that come off the bolt. Cut them off before you use the fabric. |
| Pressing | Setting the iron down and lifting it, instead of sliding it back and forth. |
What You Need to Make a Quilt
You do not need a special quilting machine for a first quilt. A basic sewing machine that sews a good straight stitch is enough. Here is what to gather, split into what you need and what makes the job easier.
| Item | Why you need it | Need it or nice to have |
|---|---|---|
| Sewing machine | Sews the seams and the quilting. You only use a straight stitch. See sewing machines for quilting beginners. | Need it |
| Quilting cotton | 100 percent cotton fabric made for quilts. It presses flat and holds a crease. | Need it |
| Batting | The middle layer. Cotton or 80/20 cotton-and-polyester batting is easy to work with. See types of quilt batting. | Need it |
| Thread | A 50-weight cotton or polyester thread in a neutral color like gray or beige works for piecing. See thread for machine quilting. | Need it |
| Rotary cutter | A round blade that cuts several layers straight and fast. See rotary cutters. | Need it |
| Self-healing cutting mat | Protects your table and the blade. Get one at least 18 x 24 inches. See cutting mats. | Need it |
| Clear quilting ruler | Guides the rotary cutter. A 6 x 24 inch ruler can cut across folded fabric. See quilting rulers for beginners. | Need it |
| Iron and ironing board | For pressing seams flat. See irons for quilting. | Need it |
| Machine needles | Start the quilt with a new needle. An 80/12 quilting or universal needle works well for quilting cotton. See needles for quilting. | Need it |
| Pins or clips | Hold seams in place while you sew. | Need it |
| Seam ripper | Takes out stitches when a seam goes wrong. Every quilter uses one. See seam rippers. | Need it |
| Safety pins or basting spray | Hold the quilt sandwich together while you quilt. See how to baste a quilt. | Need it |
| Walking foot | A presser foot that feeds the top and bottom layers so thick layers don't shift. See walking feet. | Nice to have, very helpful for quilting |
| Fabric marking pen | Marks quilting lines on the top. See fabric marking pens. | Nice to have |
| Fabric scissors | For trimming threads and small cuts. See fabric scissors. | Nice to have |
Plan Your First Quilt
Before you learn how to make a quilt step by step, make three choices. They decide almost everything else: the quilt size, the square size, and how many fabrics you use.
- Size. A baby quilt (about 36 x 52 inches) or a lap quilt (about 50 x 65 inches) is a good first project. It is small enough to finish and to fit under a home sewing machine when you quilt it. Our quilt size chart lists bed sizes if you want something bigger later.
- Square size. Bigger squares mean fewer seams. 5- or 6-inch finished squares are a good middle ground. 10-inch squares go fast and show off large prints.
- Fabrics. Three to five fabrics that look good together are plenty. Mix light, medium, and dark so the squares stand apart from each other. A print that reads as one solid color from across the room is easier to place than a busy one.
Finished size and cut size are not the same. Every square loses 1/4 inch on each side to the seams. So a square that should show 5 inches in the finished quilt is cut 5 1/2 inches. Patterns and the planner below always tell you which one they mean.
Using Precut Fabric
Precuts are bundles of fabric already cut to standard sizes, so you skip much of the cutting. They are a popular way to make a first quilt. If you want the fabric and pattern chosen for you, see our picks for the best quilt kits for beginners. These are the standard sizes:
| Precut | What is in it | Good for |
|---|---|---|
| Charm pack | 42 squares, 5 x 5 inches | A small baby quilt or a table topper |
| Layer cake | 42 squares, 10 x 10 inches | A throw-size square quilt |
| Jelly roll | 40 strips, 2 1/2 inches wide and about 42 to 44 inches long | Strip quilts and binding |
| Fat quarter | One piece about 18 x 22 inches | Cutting your own squares from many prints |
A precut square still loses 1/4 inch on each side to the seams. A 5-inch charm square finishes at 4 1/2 inches, so one charm pack laid out 6 squares across and 7 down makes a quilt top about 27 x 31 1/2 inches, before any border. A layer cake in the same 6 x 7 layout finishes at about 57 x 66 1/2 inches.
First Quilt Planner
First Quilt Planner
Pick a size, a square size and how many fabrics you want to use. The planner works out the layout, the cutting list and how much fabric, batting and binding to buy for a simple squares quilt.
First Quilt Planner by QuiltGearHQ.com
Step 1: Choose and Prepare Your Fabric
Use quilting cotton for the top and backing. It is woven tightly, frays less than looser fabrics, and presses flat. Quilting cotton is usually sold about 42 inches wide, and you can use only about 40 inches after you cut off the selvages. That is the number the planner uses.
Should you prewash? Quilters disagree, and both choices work. Prewashing shrinks the fabric before you cut and washes out extra dye, which matters most with dark reds and blues next to white. Skipping it saves time and gives the finished quilt a soft, crinkled look after the first wash.
Quilting Daily suggests prewashing for quilts that will be washed, and warns that precut fabric can distort in the wash. To test a fabric for bleeding, soak a scrap in cool soapy water for about 30 minutes. If the water turns color, the fabric bleeds dye. If you prewash, wash all of the fabric for the quilt, including the backing.
Press the fabric before you cut it. Cutting a wrinkled piece gives you squares that are not square.
Step 2: Cut the Squares
Quilters cut squares in two passes. First, cut long strips across the fabric's width, then cut the strips into squares. This is faster and more accurate than cutting each square individually.
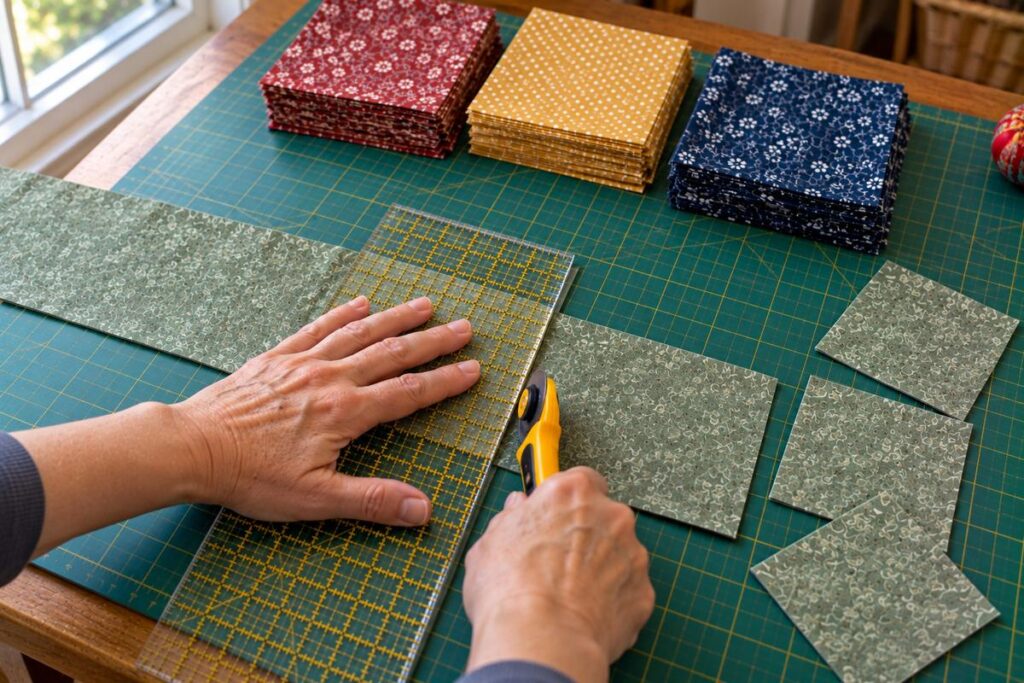
- Fold the fabric in half with the selvages together, the way it came off the bolt. Lay it on the mat with the fold toward you.
- If the fold ripples, slide the selvages sideways against each other until the fold lies flat. Then line up a ruler line with the fold and trim one raw edge (the cut edge, not the selvage) straight, so the cut is at a right angle to the fold.
- Turn the cutting mat or walk around the table so the clean edge is on the side you will measure from. Cut strips as wide as your cut square size, for example, 5 1/2 inches.
- Open a strip, trim off the selvage ends, and cut it into squares the same size.
- Every few strips, check that the folded edge still lines up with a ruler line. If the strip bends into a V at the fold, trim the edge straight again.
Cut safely. Always cut away from your body, keep your hand holding the ruler away from the edge, and close the blade guard every time you set the cutter down, even for a second. A rotary blade is very sharp and cuts skin as easily as fabric.
Step 3: Sew the Squares into Rows
Lay all the squares out on a bed, a floor, or a design wall (a flannel- or batting-covered wall that fabric sticks to) and move them around until you like the arrangement. Take a photo of the layout with your phone so you can put the squares back in the same order. Then stack each row in order, left to right.
Sew the squares together right sides together (printed sides facing each other) with a 1/4-inch seam allowance. Quilting uses 1/4 inch, not the 5/8 inch used in garment sewing, and staying accurate matters. If every seam is off by a little, the error adds up across a row, and the rows will not line up.
Many machines have a 1/4 inch presser foot with a guide on the side, or a mark on the needle plate.
Before you start, test it. Quilting Daily suggests a simple check: sew two strips, each 1 1/2 inches wide, press, and measure. The piece should be exactly 2 1/2 inches wide. If it is narrower, your seam is too wide. Many quilters sew a scant 1/4 inch, a thread or two narrower than a true 1/4 inch, because the pressed seam fold uses up a little fabric. A strip of painter's tape on the machine bed makes a good guide if your foot does not have one.
You do not need to backstitch at the start and end of each seam, because the next seam crosses it and holds it in place. Set a slightly shorter stitch than normal, about 2 mm, so the ends do not pull open.
To go faster, use chain piecing. Feed one pair of squares through the machine, then feed the next pair right behind it without cutting the thread. You get a chain of pairs that you snip apart afterward.
Step 4: Press the Seams
Press each seam before you sew across it. First, press the seam flat as sewn. This sets the stitches into the fabric. Then open the squares and press the seam allowance to one side. When you can, press toward the darker fabric so the seam does not show through a light square. If that rule and the row rule below disagree, follow the row rule.
Here is the trick that makes the corners match. Press all the seams in row 1 toward the right, all the seams in row 2 toward the left, and keep alternating down the quilt. When you join two rows, the seam allowances face opposite ways and lock against each other. Quilters call this nesting the seams.
Press, do not iron. Sliding the iron back and forth stretches the fabric and pulls squares out of shape. Lift the iron and set it down. Some quilters press seams open instead of to one side. That makes a flatter seam, but you lose the nesting, so pressing to the side is easier for a first quilt.
Step 5: Sew the Rows Together
Place row 1 on top of row 2 with right sides together. At each seam, push the two seam allowances together with your fingers so they nest, and pin through the seam line or just to one side. Pull each pin out just before the needle reaches it. Sew the long edge with a 1/4 inch seam. Repeat until every row is joined.
Press the long row seams all in one direction, or open, so the back of the top lies flat. Then lay the top flat and check it. If a corner is off by a lot, use your seam ripper on the short section, fix it, and resew it. A small miss of about 1/16 inch is normal and hard to see once the quilt is finished.
If you want a border, sew strips to the two long sides first, press, then sew strips to the top and bottom. Measure through the middle of the quilt to decide how long to cut each border strip, not along the edge, because the edges stretch.
Step 6: Make the Quilt Sandwich and Baste
Cut the backing and batting about 4 inches bigger than the quilt top on every side. The extra gives you room if the layers shift while you quilt. A lap quilt is usually wider than one piece of fabric, so you sew two pieces together to make a backing. Trim off the selvages first, sew the pieces together, then press the seam open. The planner tells you how. Our guide on quilt backing covers wide backing fabric and other options.
- Tape the backing to a hard floor or a big table, wrong side up. Pull it smooth and a little taut, but not stretched.
- Lay the batting on top and smooth it out from the center.
- Center the quilt top on the batting, right side up.
- Baste the layers. Safety pins are the most common way. Place them about 3 to 4 inches apart, about the width of your fist. Basting spray is faster on a small quilt. Our full guide on how to baste a quilt compares the methods.
Step 7: Quilt the Layers Together
Quilting is the stitching that holds the three layers together. For a first quilt, straight lines are the easiest choice.
- Stitch in the ditch. Sew right in the seam lines between the squares. The stitches hide in the seams.
- Straight lines. Sew 1/4 inch on each side of the seams, or diagonal lines from corner to corner through the squares. Mark them first with a ruler and a marking pen.
A walking foot helps a lot here. A regular presser foot pushes the top layer forward while the feed dogs (the small teeth under the needle) pull the bottom layer, which can cause puckers. A walking foot moves the top layer along with the bottom. Missouri Star suggests a stitch length of 2.5 to 3 mm for most walking foot quilting.
Before each line, lower the needle once and pull the bobbin thread up to the top so it doesn't tangle underneath. Start and end each line with a few very short stitches to lock it. Lines that run off the edge of the quilt don't need this because the binding covers the ends.
Start in the middle of the quilt and work out toward the edges, so any extra fabric is pushed outward instead of trapped. Roll the side of the quilt that goes under the machine arm so it fits, and support the quilt's weight on a table so it doesn't drag. Check your batting package for the maximum distance between quilting lines. Most batting packages list a maximum distance, and lines farther apart than that can let the batting shift or bunch up when the quilt is washed.
Remove safety pins as you go. Never sew over them. If the stitches look loopy on the back, see our guide on how to fix tension on a sewing machine.
Step 8: Square Up and Bind
When the quilting is done, trim the extra batting and backing even with the quilt top. Use a long ruler and a square ruler at the corners so the edges are straight and the corners are true right angles. Our guide on how to square up a quilt shows the details.
Binding covers the raw edges. The most common method:
- Cut strips 2 1/2 inches wide across the fabric width. 2 1/4 and 2 1/2 inches are the most common widths. You need enough to go around the quilt plus 10 to 15 inches. The planner uses 12.
- Join the strips end to end with diagonal seams, which spread out the bulk. Fold the long strip in half lengthwise, wrong sides together, and press.
- Start in the middle of one side, not at a corner, and leave about 8 inches of binding loose. Sew the raw edges to the front of the quilt with a 1/4 inch seam. Stop 1/4 inch before each corner and fold the binding to make a neat 45-degree corner, called a miter. Stop about 12 inches from where you started to leave room to join the two ends.
- Fold the binding to the back and sew it down by hand, or sew it on the front by machine.
Our full guide on how to bind a quilt has a binding calculator and step-by-step photos for the corners and the final join.
Step 9: Label and Wash It
Write your name, the date, and who the quilt is for on a piece of fabric with a permanent fabric pen, and sew it to a back corner. It takes five minutes, and it matters to whoever owns the quilt years from now.
Washing is up to you. A wash in cool water on a gentle cycle softens the quilt and gives it the crinkled look many quilters like, especially with cotton batting. If you did not prewash, add a color catcher sheet (a dye-trapping sheet sold with laundry products) to the wash in case any dye runs.
Common First Quilt Mistakes
| Mistake | What happens | How to avoid it |
|---|---|---|
| Using a 5/8 inch seam | Squares come out too small and the quilt ends up smaller than planned | Use 1/4 inch and check it with a test seam |
| Cutting squares at the finished size | Everything comes out 1/2 inch too small | Add 1/2 inch to the finished size before you cut |
| Ironing instead of pressing | Squares stretch and rows go wavy | Lift and set the iron down |
| Pressing every row the same way | Seams pile up and corners do not meet | Alternate the pressing direction row by row |
| Backing the same size as the top | No room if the layers shift, edges come up short | Cut backing and batting 4 inches bigger on every side |
| Quilting lines too far apart | Batting shifts or bunches after washing | Check the batting label for the maximum spacing |
| Puckers or folds on the back | The backing shifted while you quilted | Baste closer together, use a walking foot and quilt from the center out |
| Wavy borders | Borders cut to the length of the stretched edge | Measure through the middle of the quilt and cut borders to that length |
| Starting too big | The project stalls before it is done | Start with a baby or lap quilt and large squares |
Frequently Asked Questions
How do you make a quilt for beginners?
Start with a baby or lap quilt made of plain squares. Cut the squares, sew them into rows with a 1/4 inch seam, press, and join the rows. Then layer the top with batting and backing, baste, quilt straight lines with a walking foot, and bind the edges.
What is the easiest quilt for a beginner to make?
A quilt made of plain squares is the easiest. Every piece is the same size, every seam is straight, and you learn cutting, the 1/4 inch seam, pressing, and binding without any tricky points to match.
Can I make a quilt with a regular sewing machine?
Yes. Any machine with a good straight stitch can piece a quilt top and quilt a baby or lap quilt with straight lines. A walking foot makes the quilting easier. Bigger quilts are harder to fit under a small machine arm.
How much fabric do I need for a lap quilt?
For a 50 x 65 inch lap quilt made of 5 inch finished squares in 4 fabrics, plan on about 1 yard of each fabric, 3 1/4 yards for the backing and 5/8 yard for binding. Use the planner above for other sizes.
What seam allowance is used in quilting?
Quilting uses a 1/4 inch seam allowance. It is narrower than the 5/8 inch used in garment sewing, so check your machine with a test seam before you start.
Do I need to prewash quilting fabric?
No, but you can. Prewashing shrinks the fabric and removes extra dye before you sew. Skipping it saves time and gives the quilt a soft, crinkled look after the first wash. Most quilters do not prewash precuts like charm packs and jelly rolls, because the small pieces can fray, shrink, and lose their shape in the wash.
Where to Go Next
Once you know how to make a quilt from squares, try a pattern with strips or half square triangles (squares made of two triangles). Our guides on batting types, rulers for beginners, and walking feet will help you pick gear as you go. For a bigger quilt on a small machine, try our quilt as you go guide next.